So you have been tasked with creating a perspective section in Rhino and you have no idea where to start the process of cutting that digital model in half and having it look like it has a realistic perspective.
While there are tutorials on how to get this done all over the place. Here is a simple guide so you can churn out those orthographic drawings that bit quicker.
Before we start, it is important to understand you will not be cutting your model in half or deleting it in any way. So feel free to use the original or final version of your model without needing to copy and paste it. However, I would recommend you save your file before proceeding.
Rhino 3D is a software that could crash or corrupt so taking extra precaution is never a bad idea!
contents
Step 1: Prepare your building in Rhino
Get your building ready in Rhino and decide on the angle you will take to cut your building in half. Architecturally, sectional drawings are often best when they show the journey of the user of the building across multiple floors or spaces.
Maximizing what you can show with the cut by curating a line that shows off your building to the best of its ability and emphasizes the journey of the user as they move through your designed space is optimal.
In this example, I am even going to use the section line at an unconventional angle to show how the section shows all the floors of the design. So do not shy away from straying away from the typical east, east, south or north angles.
Whatever you choose, the process is the same so do not worry!

Step 2: Create a clipping plane
To start with, while looking in the top view, go to the command line where you type command into the search bar in Rhino. Type “ClippingPlane” then select “Vertical” and select two consecutive points that are at the same angle you would like the cut line to be in.

It does not matter where you select on the model or how far apart the points are. As long as you get the desired angle. Then, just press “enter” to use the same width.
At this stage you may find that the clipping plane does not intersect your model at all or that the plane shows the opposite side to what you want.
If your clipping plane doesn’t intersect the object, simply click on the clipping plane and go to properties on the right and look for the clipping plane icon which looks like this under the properties tab.

Then make sure you have ticked the box for the perspective view of Rhino or any other views you may want to see from. You should be able to see the cut line into your 3D model once turned on.
If the clipping plane is the wrong way round and shows the opposite side of the building you want, it is easily fixed by rotating the clipping plane by 180 degrees. Use Rhino’s Gumball feature or even the “rotate” command to rotate.

Step 3: Set your perspective
As you can see from the previous step, the perspective I used to display the sectional cut wasn’t the best at showing off the inside of the building like a perspective section should. Therefore, it is mandatory you choose the best angle for your perspective section in this step and save this view.
First, toggle your model around to show the best angle. Ideally, you would want the middle of the drawing to be where the view goes into one point perspective and the ends to be where the walls look like they close in a bit more.
Choose carefully as this will be the final view that your sectional drawing will have from now on and you will have to repeat this step if you are unhappy with it later.

Once selected, type the command “NamedView” and save it by pressing the save icon in the top left of the ‘Named Views’ panel. As you can see from the example, I have saved my view and called it “Perspective Section 1.1”.

Saving the view ensures you can quickly go back to the view without having to re-toggle the model with ease if you make a mistake. Just double click on the view in the named view panel to get back to it.
Step 4: Turning your 3D perspective into 2D
So, in order for you to produce a beautiful Sectional perspective drawing, you will need to edit it in an additional software outside of Rhino. In this example, we will be exporting the linework to illustrator to clean it up and then later Photoshop. Here’s where your 3D model becomes 2D!
First of all, make sure your model is still being viewed in the perspective you have chosen and the clipping plane is intersecting your model and type the command “Make2D”, then select everything or press “Ctrl + A” and finally press ‘enter’ when done. A dialogue box will then appear looking like this.

Make sure your settings are the same as on this one before you proceed and press OK. You can have a play around with the settings but make sure “View” and “Clipping plane intersections” are definitely selected. Click “Ok”.
You may see your Rhino software load for a bit as lines are drawn. Go to the top view and zoom out to find where your lines have been placed on your model. Often it will be placed around the 0,0 Coordinates of your canvas. Here is where mine ended up.

Once zoomed in, you should be able to see the lines you have made in all of its glory. Do not worry, once you export the lines you will be able to differentiate between cut lines and lines in the background of the drawing. Rhino just isn’t able to show this yet.

Select all the lines of the Make2D drawing and type in the command “Export”. Press “Enter” when done. When saving this file, I find it easiest to export the lines as an SVG file as it is most compatible with all software and then I will name the file accordingly. Click Save once you are happy.

Step 5: choosing a scale
After you have exported the SVG file, you will be asked to input a series of settings. I kept most of the settings the same except I used A3 landscape under the “size” setting.
In addition, under the “View and Output Scale” category, I first scrolled down to select a scale of 1:200 and then adjusted the window accordingly by pressing ‘set’ and then ‘move’ in the command line to adjust the window.

Select an orientation that shows the context of your model you would like to show as well as sufficient detail about the building itself.
Please note, if your model isn’t already modeled to scale using the correct units then this feature is useless and won’t be accurate. Ensuring you practice making things to scale from the beginning will often save work down the line.

Step 6: Cleaning up the line work
Because of our previous effort in exporting the file in Rhino as an SVG, the work in Illustrator will be that bit simpler.
First, open up any document in Illustrator and drag the new SVG file you just created onto the template. The file will open up in a new document but that is Ok. Simply close down the original file you created and keep the one with the line drawing. The export from Rhino should appear at the exact same scale like so.

Now, you could theoretically edit the lines of your drawing forever to even alter the structure of the building but to keep things simple, there are a few steps in cleaning up the lines of your drawing to keep it looking professional.
Use layers
As you can see, the lines of your 3D model in Rhino that were intersected by the clipping plane should be thicker and show the cuts of the model. On Illustrator, click on one of these thicker lines and go to Select > Same > Stroke Weight. Then create a new layer in Illustrator and drag these lines into a new layer. Now you can easily change the weight, color or fill of these cut lines.
Add and delete unnecessary lines
It is also very easy to get rid of any lines that do not add to the technical drawing or are features of the 3D model but not of the actual building. Use the Eraser and Scissor tool for this.
Add a thick ground line
Finally, make sure you add in a thick ground line that clearly shows where the ground is cut. This is important as the export from Rhino will likely not show this unless your model includes all the context from your site.

Step 7: Edit your drawing to add atmosphere
One of the cool things about creating drawings in architecture is that there is no one way to do anything when it comes to getting creative. So how you add life, atmosphere and context to your drawing is entirely up to you and how you want to represent your space.
The internet is your best friend when it comes to gaining ideas like this. Simply look at online tutorials, browse Pinterest or even scour your peers’ work for a bit of inspiration.
Whatever you do, make sure you at least keep the cut lines of your drawing clear as after all, it is a sectional perspective drawing and the background of the image shouldn’t compromise the information you are able to get from the Section line. The cut lines should remain crucial and stand out.
One of my favorite ways is to export the linework to Photoshop by simply copy and pasting it and adding in texture, shadows, or context that way. Here are some useful ideas on what to add to your drawing to make it look professional and high quality.
– People using the building
– Background buildings
– Trees
– Topography changes
– Material texture
– Sun angles at different times of the day
– Bioclimatic information (wind, radiation, ventilation pattern)
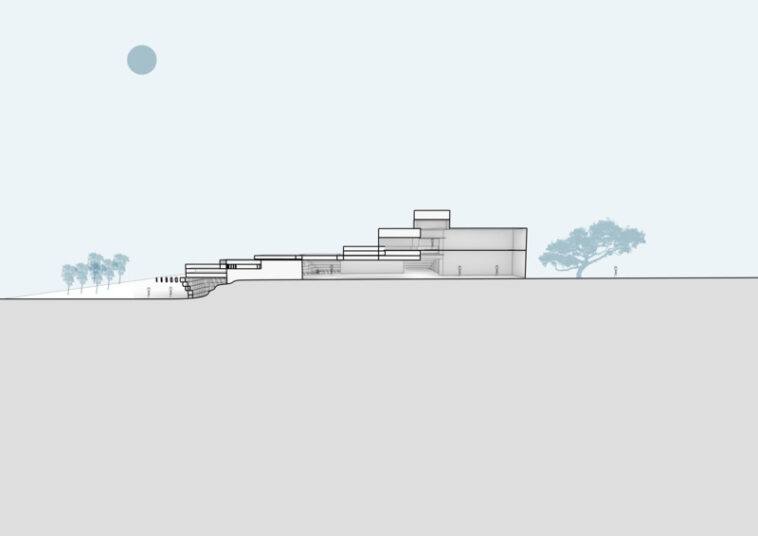
I had a quick go at editing my Sectional Perspective drawing to see what it would look like. Here’s what I got. Don’t forget to add in a scale and where you cut your section from in plan in a corner of your page.
