There are hundreds of Rhino plugins available, each with its own unique set of features and capabilities. In this article, we will take a look at some of the most useful Rhino 3D plugins on the market. These plugins are chosen based on their popularity, usefulness, and overall impact on enhancing what you can do with the software and the quality of modeling you can produce.
Whether you are a beginner or an experienced Rhino user, these plugins should enhance your workflow and help you create even more impressive 3D models. So without further ado, let’s dive in and take a look at the top Rhino 3D plugins.
contents
A list of the best plugins for Rhino 3D
Some plugins are strictly for the optimization of Rhino whereas others can be used alongside rhino like within grasshopper or by exporting the model to another download that is separate to the rhino file.
In this list, only plugins that can be installed and managed inside of the Rhino interface will be listed.
Section Tool
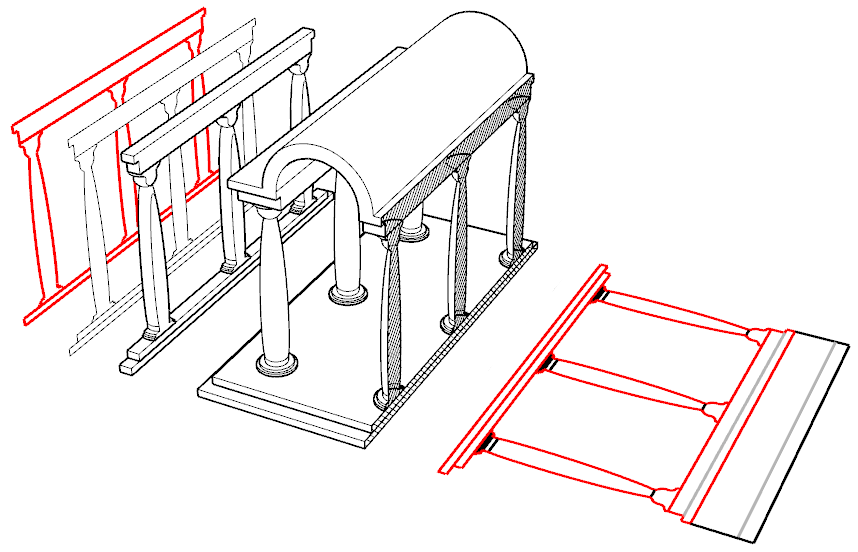
This tool helps to create sections that can be updated as the model is changed as you go along. These sections are made up of outline curves, solids, and hatches which create sections as good as if you were to use the Make2D command which is what you would do to conventionally make sections in Rhino without plugins.
It also generates an updatable 2D layout of the sections so you can see how the section changes as you go along. There are various capabilities available, such as the ability to move sections, load the location of where the section line is on a model from an external file, view models in section and generate 2D outlines of sectioned 3D models too which is perfect for creating elevations.
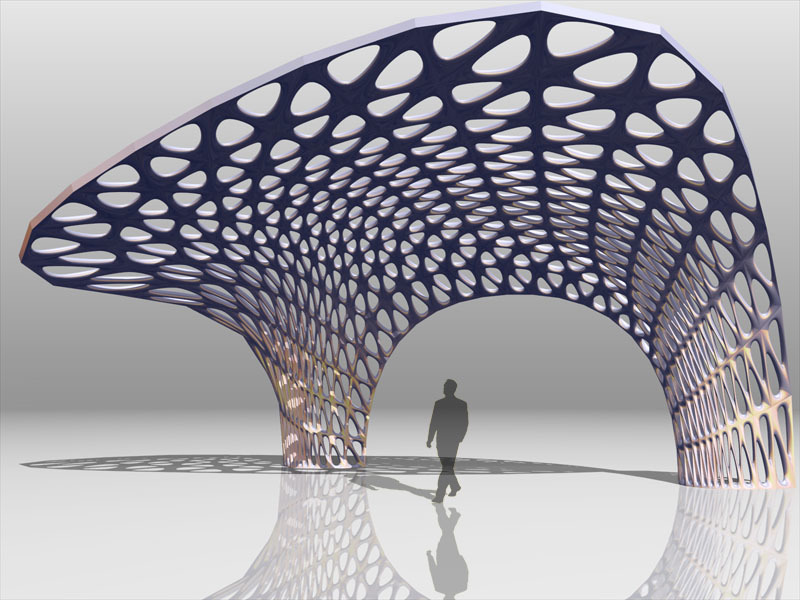
Paneling tools
PanelingTools is a plugin for Rhino and Grasshopper to help build 2D and 3D paneling solutions from concept to fabrication. This gives you more options when it comes to designing surfaces to turn into more complex shapes later and is often used to create complex topographies and facades.
If you want to make paneling more detailed and more tiles and intricate panels though, you may want to check out the parakeet plugin which is another alternative.
Because of its simple design, the software is also able to be easily analyzed in additional plug-ins such as Grasshopper if you need to conduct further analysis.
Auxpecker
AuxPecker is designed to give the user a range of materials that you can add to a Rhino model. However, the software was designed for Rhino 4 so unless you are using an older version of Rhino, this has since been replaced with the texture panel that is able to add textures to a model anyway.
However, the plug-in still works for later versions of Rhino and you may find it easier to add textures using this plug-in rather than using Rhino’s built-in user interface.

OpenNest
Have you ever needed to fit in a large number of shapes in a small area on your Rhino canvas? For example, if you were using machinery such as a laser cutter or a CNC machine, you would need to ensure that you’re using the minimum amount of material possible in order to produce the design you want.
This is where OpenNest comes in handy. You can save a tonne of time rearranging objects and tessellating shapes manually and instead download the plug-in which will automatically arrange all of your shapes without overlapping to the best of its ability.
What’s more is the plug-in is completely free and you can download it by clicking here which will take you straight to the food4rhino website. So not only will you save money on materials but you also save money by not having to pay any additional costs!
Evolute Tools
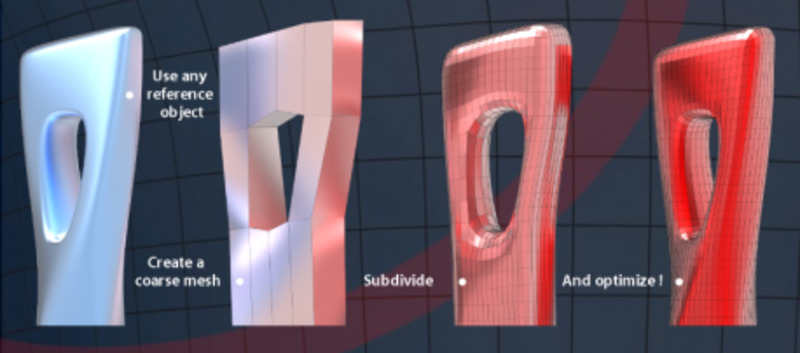
This plugin is great because it is free and also allows you to uniquely design panels using measures that are at a higher resolution than the standard mesh in rhino.
On top of this, you can optimize the mesh to get it smooth, close to a surface, or in line with a polyline for example. This is great for those who want to create tubular structures with holes and curves but also want to add texture to the top of the model using a mesh.
By toggling the coarseness of the mesh and the shape of the mesh, you will be able to form a series of different designs all from one model. Ideal if you were testing iterations or were forming a concept. However, this plugin does require you to have a basic understanding of Rhino before you use it as you already have to be competent at modeling.
If you aren’t, it is recommended you try out some architectural modeling exercises before you get started with Evolute Tools for a smoother transition into this plugin.
Mesh2Surface
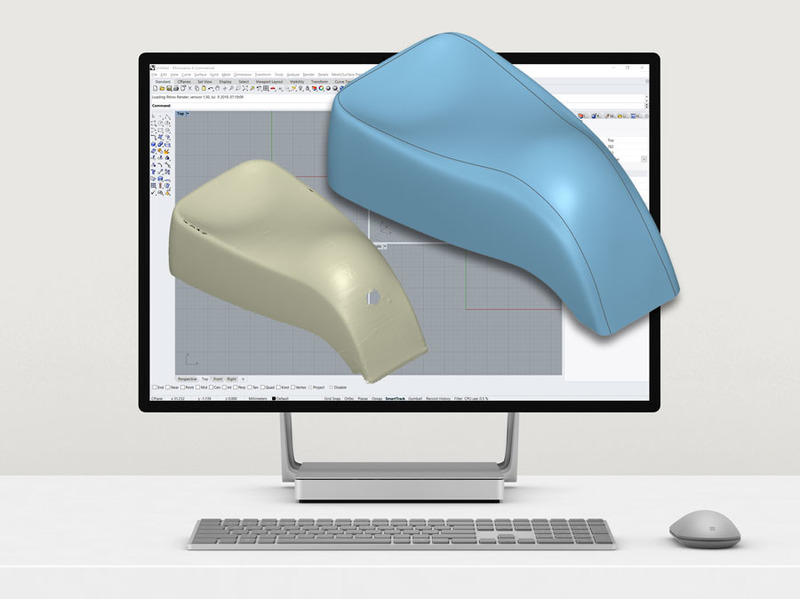
This is an extremely useful plug-in if you want to handle 3D scans but stay within Rhino. The software reverse-engineers what it is seeing and creates a digital model based on the scan. It is useful to note that in order to use this plug-in you’ll need a scanner that is good quality and can produce STL meshes to then be exported to your Rhino software.
This can speed up the process of preparing models for manufacturing and reduce the amount of labor and costs involved in design.
Lands design
Lands design is especially useful for architects as it allows you to add context to a model with ease. This includes making the topography of the area more realistic in its shape, the ability to add in irrigation systems and perhaps the most well known reason which is adding vegetation to a model.
As architects, it is hard to make sure the vegetation in a model doesn’t overpower it but also appears realistic enough so that when you render it is clear what it is. This is where land design comes in handy. They have a database of more than 8000 plant species available, together with technical details, in-depth traits, and adaptable 3D and 2D display formats, vegetation appears lush, green and realistic.
Mesh Paint 3D
Mesh Paint 3D Is a project designed by Rhino and Mcneel which can be added to create a pop of color to your Rhino model. Once you have made the model into a mesh, you will then be able to use tools such as the color wheel, eyedropper and eraser to add color to models in a way you cannot do simply by adding texture.
Bongo
While rare, it is sometimes the case that a building has a moving part. In architecture, this can be represented by an animation which is an excellent addition to a portfolio page or to demonstrate an idea to a client perhaps in practice or whilst communicating with other professionals such as civil engineers.
This is where the Bongo plug-in shines. You are able to save multiple animations on one file, create animations based on the named views of your rhino file and easily integrate the plugin with your workflow to produce clear, high quality animations without losing time.
Grasshopper
Grasshopper is one of the most important plugins for Rhino as it is able to be added with other plugins that act as secondary plugins for the software. These additional plugins are to be added to Grasshopper and often have names of animals such as Ladybug or Honeybee and focus on making calculations based on scripts.
These scripts use JavaScript as a coding language to produce designs and analysis of these designs that cannot be achieved anywhere else on rhino and in fact, is so good that most architects will use rhino grasshopper simply for the sake of analysis even if they prefer to use other software such as AutoCad to do the initial modeling.
While the multiple different boxes on the rhino dashboard can get confusing as a script is constructed, in the end, it will often produce some amazing designs and complex analyses.
What are the best plugins for Grasshopper?
It is clear that the grasshopper plugin is one of the most well used and important additions to the rhino software, especially if you’re interested in designing parametrically or analyzing the model you have designed in detail for environmental reasons or scrutinizing the structure of the design you have made.
Therefore, below is a list of the most important grasshopper plugins that can be downloaded for grasshopper to provide additional codes and components to help analyze your models.
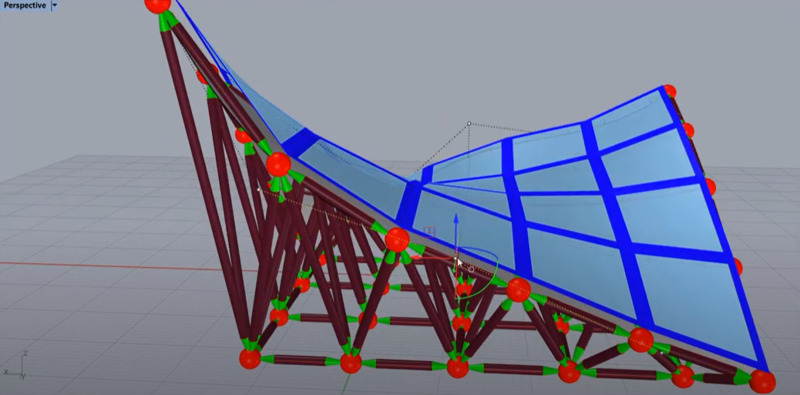
Kangaroo
Kangaroo or Kangaroo Physics is an engine that simulates the load of the model as if it were subject to gravity at the right scale based on the materials you set for the structure. It is a newer plugin that is only available in Rhino 6 and 7.
The plugin is predominantly used by those in civil engineering and can also be used to turn a curved surface into a series of flat panels which is great for designing buildings as producing large flat surfaces like this in construction outside of Rhino can be difficult and expensive.
On top of this, minimizing the surface areas of materials while keeping the same structural integrity of the model is also a feature that can be used to reduce the amount of material used in the model as well as doing complex tasks like simulating how gears may move in an engine.
The Kangaroo plugin is therefore best used for civil engineers or architects who have a strong interest in the structure of a model as even if you are able to use the plugin and get it to work, you may find it hard to understand what the plugin is telling you without a background in physics to interpret what is going on.
Fractal
A fractal is based on mathematical calculation, it produces a pattern that is repeatable and scalable to an infinite amount. The fractal Rhino plugin is able to produce three different types of fractals that are mathematically generated and can be based on different types of shapes like circles or squares.
This plugin is great for those who want to create patterns in their modeling like if they were to create a spiral or even part of a facade that requires there to be pieces of the facade that are in unison.
Heliotrope – Solar
The Heliotrope- solar plugin is a Grasshopper plug-in for modifying solar geometry.
The tool generates solar position vectors at predetermined times and dates and offers a number of parametric components for modifying those times and dates. Use it to develop designs that are solar-aware, to align geometry, to place rendering lights, or to examine incident sun on structures.
Heliotrope can be used alongside other environmental plugins such as Ladybug and Honeybee to create in depth analysis of how a model will perform in the real world in relation to the sun.

Karamba
Karamba is the ultimate plugin for parametric engineering and design. It can be used in grasshopper to work alongside and optimize algorithms such as Galapagos. This means you can simplify the process of adding in things like cross beams by coding them to be automatically added in as the model expands.
The tool is only useful for those interested in engineering alongside their architecture so it is not necessary for architects to use it as a main tool in parametric design. In an office environment, it is more likely that Karamaba will be used by a civil engineer or an architect specializing in physics after the initial design has been created.
Ladybug
The ladybug plugin for Rhino is perhaps the most used plugin amongst those who want to optimize their design for environmental performance. The features of the plugin include being able to analyze the radiation impact on the model based on real world sun data and even being able to implement sun path diagrams on top of the model that has been designed.
When a user is happy with the analyses conducted using the plugin they can then bake the data onto the model so they can export it using additional features and maybe use this data to influence design perhaps parametrically or simply just to get an idea of where to position a model.
Overall, from the most basic environmental design to the more complex scripts, Ladybug is the first plugin you should download to analyze how a model performs in relation to the sun and radiation. However, be sure to learn this software in detail as there is a chance you could run into errors if you don’t take the time to learn how the basic features of the plugin work.
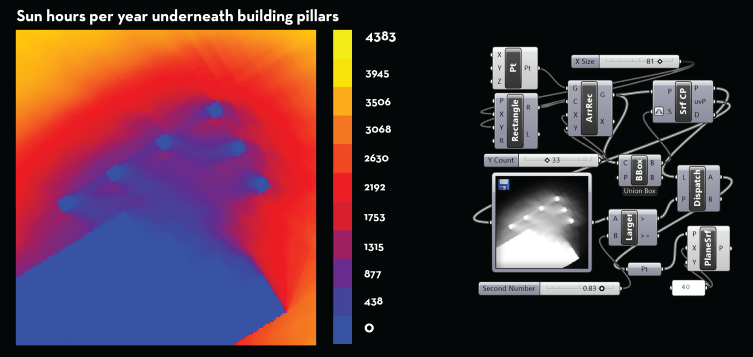
Honeybee
Like ladybug, Honeybee also aids architects and designers in producing environmental analysis of their building. The difference is the Honeybee plugin focuses on more complex data such as the sun hour analysis within the walls of a building or the amount of sun that is over a certain limit rather than producing a more general comprehensive analysis like Ladybug.
It is common for both of these to be used together, however, for those looking to take their environmental analysis to the next level honeybee should be used as you can even toggle things like the reflectivity of the windows in a building and the insulation in the walls to produce simulated light and temperature readings.
VisualArq
VisualArq is designed for freeform modeling. You can add the plugin to Grasshopper by downloading it and then change things like the number of floors in the building, the shape of the building, the heights and widths of walls and the number of support columns all by adjusting scales and inputting numbers.
The plugin is required to be paid for but there is a 90 day free trial you can take advantage of on their website here.
Once you have access, you will be able to conduct Building Information Modeling (BIM) which is essentially compiling most of the information necessary for the construction of a building that spans outside of the realm of architecture and into manufacturing and engineering for example, in one 3D model.
Elk
Elk is useful for those who want to use external data from the topography of an area and overlay it into their rhino software. Elk produces a simple way of taking downloaded data and mapping it visually.
You may have heard of sources of data such as Earth Explorer or QGIS. Using the files available on these websites, Elk will overlay data and produce topographical analysis perfect for more complex site analysis before a building is constructed and perfect for determining the best place to build on.
What are the best plugins for rendering?
While it is important to be able to model a design in the best way in Rhino, it is equally as important to be able to render that model in the best way you can, especially if it is a building that must be presented to a client to represent what it would look like in the real world.
As a result, it is vital you find the best rendering plugin you can and your PC allows so you can convey your idea in the best way possible.
Sticking with the rendering features built in to Rhino or even just adding in textures to your model to produce a final render can work but especially for final models that make their way to portfolio pages and posters, producing a high quality render can be the difference between getting a certain grade if you’re an architecture student or convincing decision makers form approving your design.
Lumion
Lumion is perhaps the most popular rendering plugin. However, the software requires a large amount of storage space to install and once installed, making sure you have the right software to run Lumion such as a fast processor and graphics card is also necessary.
If your PC is sufficient, you should be able to produce realistic renders with the option to toggle the sunlight in the model, the materials of the model and even basic context such as the type of grass and if you want scale figures in your model too.

Fluid Ray
Fluid Ray prides itself in being a simple to use rendering plug-in. They don’t claim to be the most detailed or produce the highest quality renders but they boast about being able to run without any Graphics Processing Unit (GPU) restrictions and being able to produce real time feedback as you adjust your model.
The software does live up to expectations and it is perhaps the easiest to use a rendering plugin without the need for extensive tutorials and being able to produce render quickly as you go.
Vray
Vray integrates well with Rhino and is a very realistic rendering software. As a result, you will have to have a large amount of space on your computer in order to download it (12GB) and you will also have to have a good graphics card and processor in order to run the software smoothly, especially if you want to take advantage of the software’s features.
These include being able to model in real time and have the render change as you change your model in Rhino as well as adding in the ability to create animations that move and move the camera around the mode you have designed.
Unfortunately, Vray isn’t free. Nonetheless, you can trial it for 30 days and you may find the price worth it given the high quality that can be produced with the plugin.