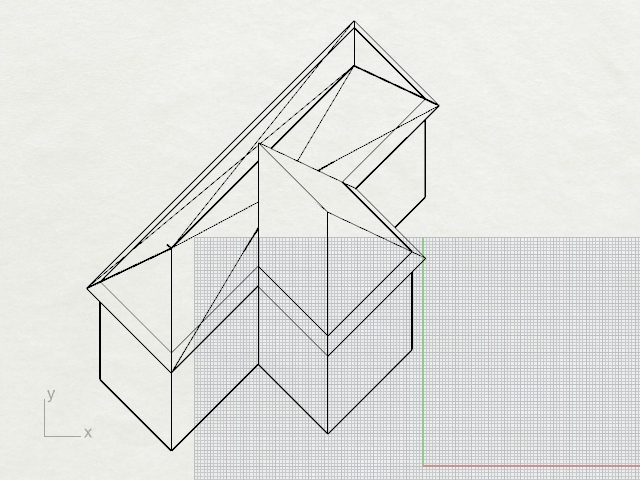
Creating an axonometric drawing in Rhino requires you to rotate, shear and zoom the model you have to create the axonometric you desire. However, what if there was an easier way to do this rather than using commands and you could just copy and paste a script like below?
! _Select _Pause _SetActiveViewport Top _Rotate 0 45 _SetActiveViewport Right _Shear w0 w0,0,1 -45 _SetActiveViewport Top _Zoom _All _Extents The process is simple, just copy and paste the above code into your Rhino command bar and your axonometric drawing will automatically process.
If it is not exactly clear how to use the above script to turn your Rhino model into the right axonometric drawing, you can use the below steps to ensure you’re following everything correctly.
How to use the script step by step
In this tutorial, I used the same model that was developed for creating a gable roof in Rhino and positioned it on the top view to start modeling.
Align your model to the X and Y axis
Next, the first thing you should do is align the model with the X and Y axis so that when the model is transformed it orients correctly. It is useful to note that the sides of the model that are facing left and facing downwards will be the only visible sides once the script is performed. So rotate your model accordingly.
To rotate your model, you can use the “rotate” command or you can use the gimbal feature of Rhino to make sure the model is in the right place as demonstrated below where a green face should face the left side and a red face should face downwards.
However, it is not necessary to align your model exactly 90 degrees either so if you have a model that isn’t as straightforward as this house design, do not worry.
Execute the script
To execute the axonometric script it is as simple as copying and pasting the script into the command bar and then selecting everything you want to transform.
To easily transform the model without selecting everything individually, you can do Ctrl + A.

If your model does not look like this after executing the script then you will need to head over to the Top view which will make the model look like the model above, in an axonometric format.
Export the lines
What you do next with your Rhino model is up to you. You can follow the steps to create a technical drawing in Rhino or you can export the lines of the axonometric as demonstrated in our article about axonometric drawings.
This is where you export the lines using the command “Make2D” and then “Export” to produce a file that can be edited in additional software such as Illustrator, Photoshop or even vectorworks to create a beautiful technical drawing.
Is there a script for axonometric 60 – 30 degrees?
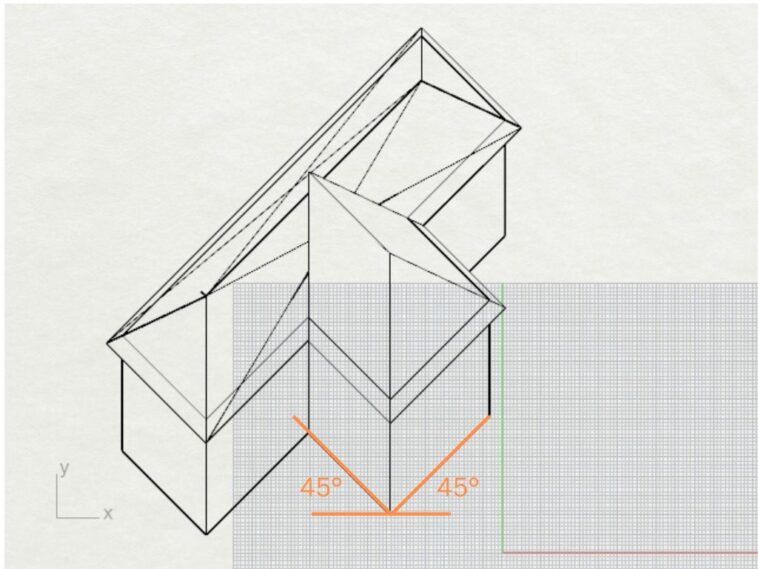
In the above script, the script that is used produces an axonometric drawing that has a 45 degree angle on either side of the model from the X axis as seen below.
However, if you want to be able to create an axonometric drawing that is angled at 60 degrees on the left side and 30 degrees on the right side, use the below script.
! _Select _Pause _SetActiveViewport Top _Rotate 0 30 _SetActiveViewport Right _Shear w0 w0,0,1 -45 _SetActiveViewport Top _Zoom _All _Extents This should produce the following result where there is a larger angle on one side of the axonometric drawing than the other
What is the best script angle to use for axonometric drawings in Rhino?
There is no best angle to use when displaying axonometrics but the 45 degree angle is certainly more common. In fact, there are even other projections of producing drawings and scripts for them that you can use such as oblique drawings and the isometric, dimetric and trimetric angles to be aware of too.
So have an experiment and if you want a challenge, perhaps come up with your own Rhino scripts if you feel like experimenting

