Being in Rhino and wondering how to turn your digital creation into a two point perspective layout without finding the answers can be frustrating.
To put it simply, just go to “Viewport properties” (Usually on the right hand side with a colour wheel as in icon) > Then click on “View” (Usually a camera icon) > Find the “projection” column under the “viewport” tab and change the drop down menu to two point perspective.
In this article, I discuss how to change this step by step in depth.
contents
How to make a two point perspective in Rhino step by step
If you’re looking for some easy step by step instructions to set up a tow point perspective view, read on and make sure you read the instructions carefully. It is a simple architectural exercise that will add to the range of technical drawings you’re able to create.
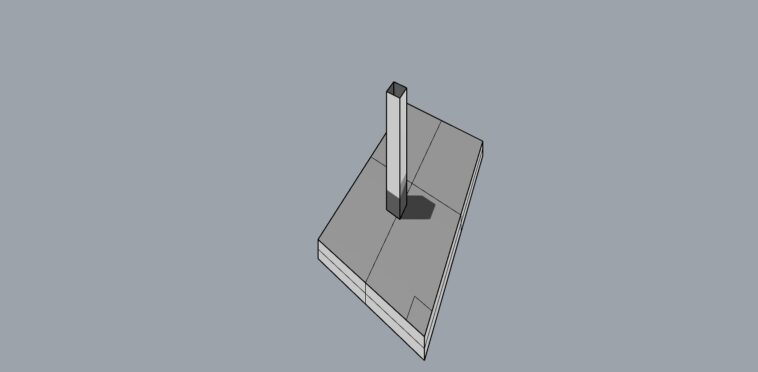
Step 1: Orient your model
Get a rough idea of where you want your model to be viewed from by toggling your model to the correct camera view in perspective.
Do not worry about getting this perfect as it will likely change once you change to two point perspective later in the steps.
Step 2: Locate the “Viewport Properties Tab”
This is usually found on the right hand side of the Rhino canvas. However, sometimes it is missing.
If you find it is there already, skip to the end of step 2, if not look for a tiny gear icon for settings on the right hand side of the screen.

Next, click on it and go to show toolbar > tick properties
Step 3: Locate the “view” tab
Go to the colourful wheel icon which represents the properties panel. The icon looks a bit like this:
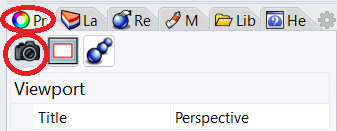
Next, click on the black camera icon which is the view tab
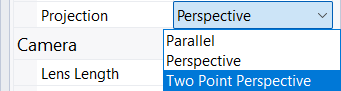
Step 4: Change to “Two Point Perspective” in the drop down menu
Under the view tab, there is a “viewport” section and then a “projection section” followed by a drop down menu next to it. It is here you can change from a perspective view to a two point perspective view but is has nothing to do with sectional drawing or elevations for that matter.
Step 5: Re-adjust model
Now your model is in two point perspective, you may find that it looks a bit different, you can then re adjust it to how you’d want or continue working on the file.
You may want to save a view here so you don’t have to keep scrolling back to where you want to view your model from using the “NamedView” command.
This will ensure you can always find the same two point perspective view in Rhino even if you accidentally move around the camera view of the canvas.
What is two point perspective?
When I use two point perspective in Rhino, it allows any face or object that is further away from the camera view in the Z direction to appear closer than it actually is. The “Z” direction in Rhino represents the heights of objects where the X and Y directions represent the depths and widths.
Imagine you are looking at a tall building from street view, the tops of a building will appear further away from the base and the ends of the building will appear further away from the points closest to you. This would show a realistic representation.
This is known as three point perspective. We view the world in three point perspective – the same default view that Rhino will use to create a realistic render.
However, when you change the settings to two point perspective, the tops of a building will not appear to be further away as there is no vanishing point in the Z axis, only in the X and Y axis.
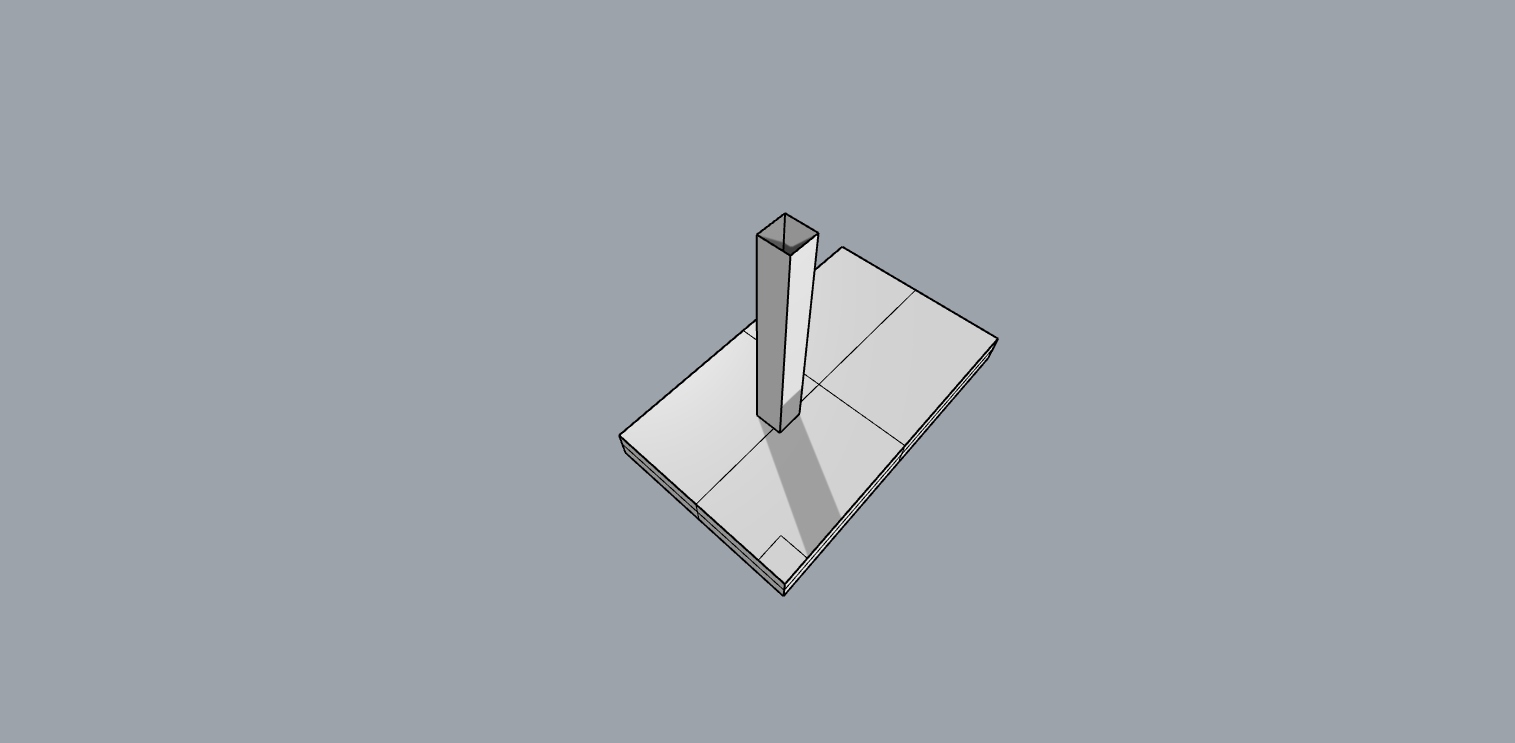
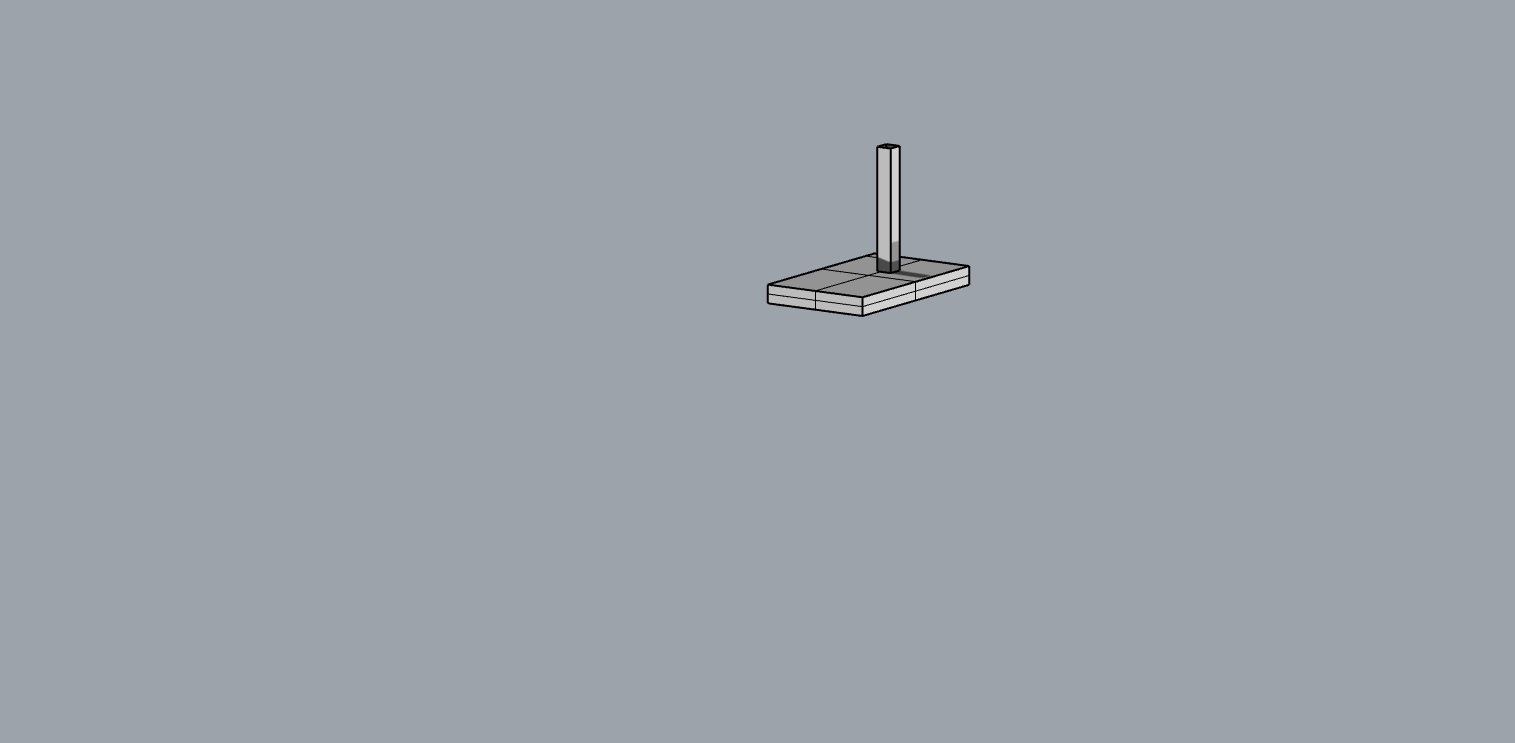
Here this phenomenon shown in Rhino as I changed to a two point perspective.
This two point perspective view is not representative of the human eye but can be used to demonstrate the features of your model in the Z axis in greater detail and exaggerate the widths and depths in the “X” and “Y” axis.

Why use two point perspective in Rhino?
Because two point perspective represents the heights of a model in greater detail as the heights do not have a vanishing point. Tall buildings or tall parts of a Rhino model will not appear to vanish in to the sky or ground.
It gives the most realistic view of the “Z” face of a building while also allowing the sides of the building to vanish in the “X” and “Y” axis.
Two point perspective alternatives
Sometimes, in order to get the same effect from a two point perspective view, there are other things you can do besides creating another type of drawing entirely such as an oblique drawing or an axonometric drawing.
Use Parallel view
You could use Parallel view which will also represent the Z face of a building without a lot of warping. In this view, there is just one vanishing point so any sides or faces all appear to converge to one point. This form of perspective in the viewport will be lost.
To change to parallel view, find the same drop down menu to change to two point perspective and instead select “parallel”.
Change the lens length
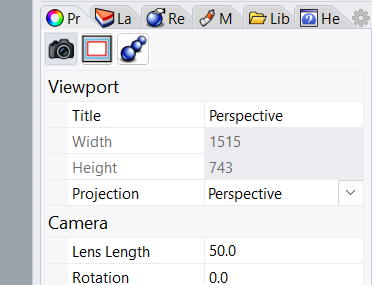
You can also create similar effects to using two point perspective by changing the lens length of the camera. To do this go to viewport properties > Camera > Lens length
You will be able to adjust how wide the camera angle is which can distort the outside of an image by quite a bit. So changing to a high lens length, things can appear less distorted and clearer over large distances.
To summarise, a large lens length can show more of your model with less distortion. A small one can show less of your model but at greater detail, perfect for showing an inside view of a model or a particular highlight.
You would do this by first changing your view to two point perspective and adjusting your model to how you want. Then doing the “Make2D” command to create a line drawing in Rhino and doing the “export” command to export these lines to a file type and scale and orientation you desire.
From there you can re-upload to Rhino to edit further or use and alternative line drawings editing software like Vectorworks or Adobe Illustrator