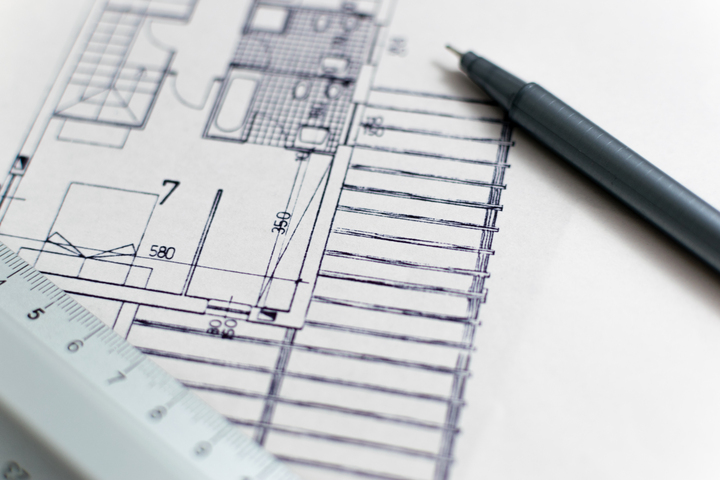
So you have clicked on our guide on modeling in Rhino which would indicate you are fed up with struggling with the software and wonder how others make creating models seem so effortless. If this is you, you have come to the right place – our guide on modeling in Rhino
Imagine being able to finally grasp the possibilities of the software where you’re able to consistently create stunning 3D models and use them in your architecture portfolio and wow your peers and colleagues with the work you have done. It is a shame to have brilliant ideas in architecture but not have the skill set to translate those ideas digitally and represent your ideas in the way you’d like.
We’ll walk you through the basics of the software, how to practice using it, and also give you some alternatives to modeling in Rhino in the way you have been doing. So if you’re ready to grasp the software and take your skills to the next level, keep reading to create professional 3D models!
contents
Rhino basics tutorial in 3D modeling
Those who are proficient in using the Rhino software all have one thing in common – they practice the software a lot and they learned their skills over months and years slowly. However, there are certainly things you can do to speed up the learning curve to make sure you aren’t stuck behind your peers.
These include equipping yourself with the basics of the software to begin with so you’re aware of everything you’re doing as you go about creating a model, being able to quickly identify and resolve errors and finally, understanding what it really means to use Rhino for architecture. Not all things need to be modeled to the same quality and not all things need to be modeled at all.
To understand the basics, you can try to do some architectural modeling exercises for Rhino which can be read on the Architecture Genie website. However, you may also need to follow the below basic tutorial to understand 3D modeling.
In the following step’s, follow along and create an extruded curve. You will use five different commands in the process which will get you up to speed with how the software works and how to create a basic shape without anything fancy like additional plugins or tricks.
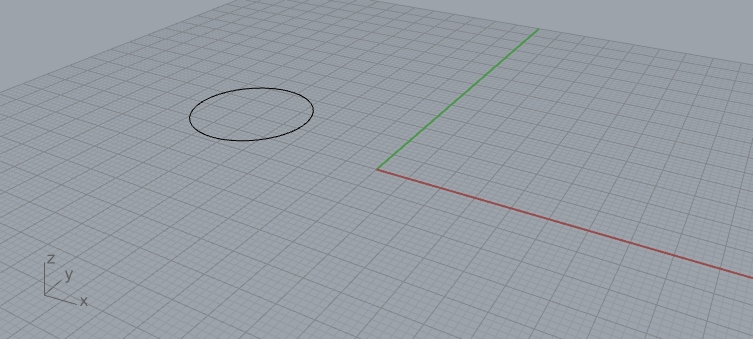
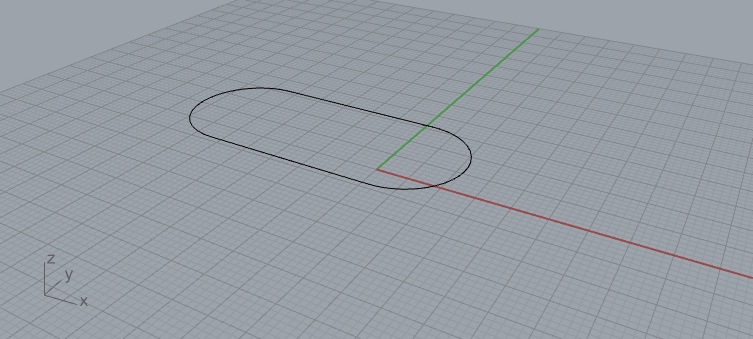
Step 1: Circle command
First of all, type in the word “circle” to the command line in Rhino. This will give you the option to choose where you’d like the center of the circle to be as well as give you the option to input the length of the radius of the circle you are drawing.
If you were to do this again in a different plane, you would be able to change the orientation of the circle. However, because this was done in the perspective view, the circle is laid horizontally on top of the grid.
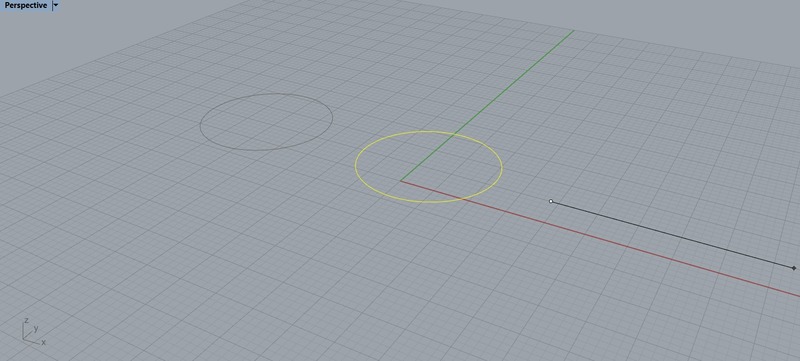
Step 2: Copy command
After you have formed a circle with the dimensions you require, the next step would be to copy the circle and move it to somewhere else on the canvas. This is because we want to form a mirror image of the circle and move it somewhere else on the canvas but have the same size.
Holding down shift while you position this new circle keeps the circle in line on the grid, positioning it either directly north, south, east or west. It is also possible to input the length of the distance away from the first circle you want the second circle to be.
Once decided, simply click on the canvas and you will have formed a new circle. Next, click escape on the keyboard to stop copying the shape as the copy tool doesn’t stop creating new circles unless you tell it to.
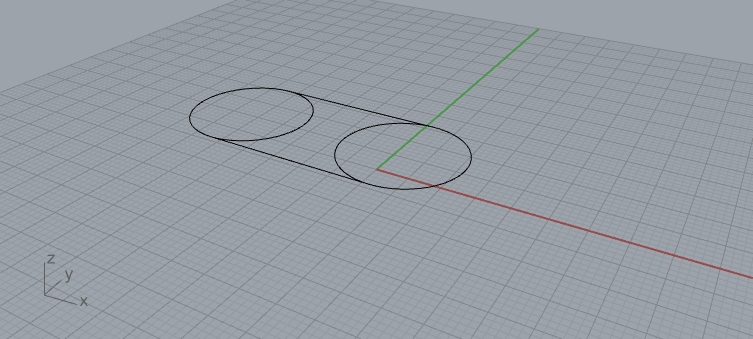
Step 3: Line command
At this stage, you should have two circles next to each other and the next stage would be to add two lines that connect these two circles. To start, type “line” in the command line or select the line tool from the Rhino toolbar and begin finding the edge of the first circle.
It may be the case that you find it hard to locate the edge of the circle because your mouse does not snap to the exact edge of the circle. In this case, locate the “Osnap” tools at the bottom of the Rhino dashboard which will allow your mouse to snap to the right lines on the canvas by selecting the snapping features you want.
For this tutorial, it would be useful to turn on the “end”, “near”, “point”, “mid”, “perp” and “tan” Osnaps to make sure you can select the very edge of the circle to join the two circles together like below.
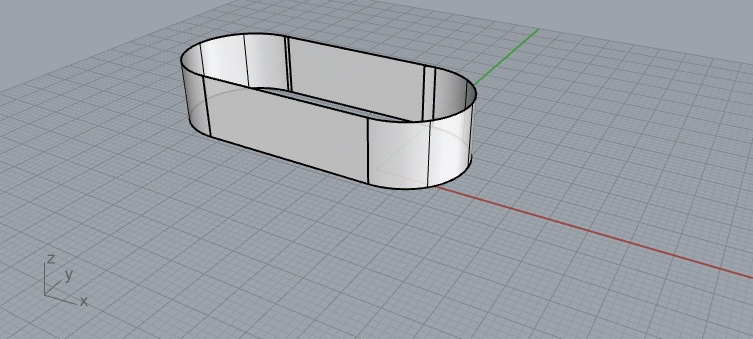
Step 3: Trim command
Now you have formed the basic shape of the line you will be extruding, before turning these lines into a 3D object, you’d have to get rid of the lines that don’t make up the edge of the shape. To do this, use the “trim” command.
You will first be asked to select all of the cutting objects of the trim command in which case you should select all the lines in your model. To select multiple lines if you cannot select them all at once, hold down shift while you click. Click enter on the keyboard to confirm your selection
Next, you need to get rid of all the lines in between the outside curve on the two circles that you made earlier. To do this, simply click on these lines and the trim tool will automatically delete them from the model. Be sure to get rid of all the lines in between as you can get funny looking shapes if you do not remove an edge. Zoom in and look carefully to double check.
Step 5: ExtrudeCrv command
In this step, you can begin extruding the curve to make the shape you want. Simply type into the command bar the words “ExtrudeCrv” and then Rhino will ask you how much you want to extrude the curve after clicking on it.
You can also manually extrude the curve without inputting a number by using your mouse but to keep things accurate, you can practice putting in a dimension manually. This can be great to get into a good habit of because as you create more intricate models it is likely you’ll run into errors if you do not pay attention to details.
What else can you model in Rhino?
Besides creating a basic extruded curve in rhino, there are other shapes you can create in Rhino that will ensure you can create whatever you can come up with in your head in a concept. Although, you may need to use some useful plugins to do so in some cases to get more out of the software.
Surfaces
Being able to create surfaces is a basic way to make sure you’re able to create these shapes you need. Once you have done this, using the tool or the command line, you can then toggle the surfaces and bend them into the shape you need.
It is also possible to generate surfaces from points using grasshopper which is a cool way to use scripting to model surfaces in Rhino. Also, you can mold surfaces to objects which is a great way to model topography or potentially start modeling the surface of a more complex geometry.
Objects
While it is obvious that you use Rhino to model objects, the range of objects that are able to be produced are often not talked about. For example, just in the default dashboard of Rhino 3D, you can form cubes, spheres, tubes, cones and paraboloids.
To access these additional shapes you can type this into the command bar or also click on the small arrow on the bottom right-hand corner of every object on the Rhino User interface. Through these arrows you can see the range of shapes that are related to the main shape you have clicked on.
As an example, clicking on the “box” shape will give you the options to form a cylinder, tube and cone but these don’t appear on the user interface straight away.
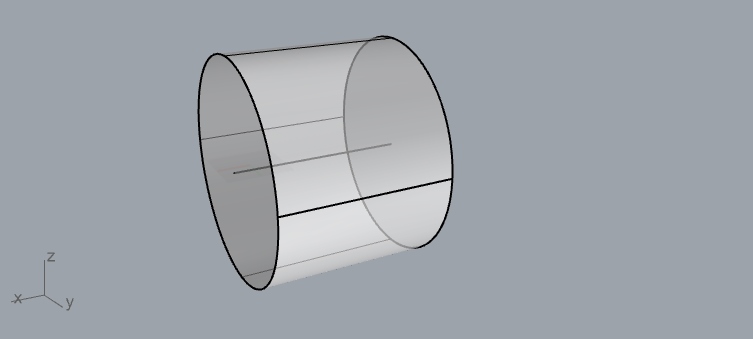
Pipes
Tubes or pipes are crucial when modeling. However, there are a range of ways to create them. More obvious ways you can start creating a pipe is by using the “pipe” command. However there are a handful of ways that can be used depending on your preference in modeling and what you’re trying to achieve as you model
Using the sweep command
The sweep command automatically creates a pipe from a series of lines, as long as they are joined. To start doing this, use the line tool to create a line that is to your liking. As you do so, bear in mind that this line will form the center of the pipe regardless of if the pipe bends in any direction or cuts through any other shape.
Once this line is formed, simply run the “sweep” command which will prompt you to input a diameter for the pipe and the pipe will then be automatically created.
Using Grasshopper
Grasshopper can also be used to model the pipes in a model. This method is especially handy where there are a lot of pipes that need to be created from lines. With this method, you can easily control the form, diameter and location of the pipes without having to manually control everything in the standard Rhino dashboard.
In this sense, Grasshopper can save a lot of time and it is recommended to learn how to use it once you have mastered the basics of Rhino.
Best ways to use Rhino for modeling in architecture
Rhino can be used by a variety of professionals, not just architects. So what should architects be aware of and how can they use the software to understand how to do modeling in Rhino to better their work?
To create concepts
Throughout the creative process of designing, it is often necessary to come up with an initial idea before you begin with the entire model. Rhino can therefore be a great way to draft ideas and represent ideas you have in your head or perhaps in a sketch in 3D format quickly and easily.
In these conceptual models, you can leave out the details of the model and perhaps purposefully only show the initial workings of an idea that may involve a simple shape or overall theme you want the building to follow.
To run simulations
Running simulations is getting increasingly more important in architecture as it is necessary to know the environmental performance of a building not only to benefit the users of the building but also to reduce emissions and electricity usage within the building once they are constructed.
Using modeling and then running the model through additional plugins to monitor environmental performance is therefore crucial to convince professionals and architectural designers that an idea makes sense environmentally.
Not only this, but running a “final” design through structural testing simulations for example may reveal areas of a building that need to be changed or present an opportunity for additional features to be added.
For example, if you notice through running simulations there is a weak area of a building structural through using the Kangaroo Physics plugin for example, this can be a great opportunity to add in further support while making sure it makes sense architecturally.
This prevents so much back and forth communication between those scrutinizing an architect’s work and the architect.
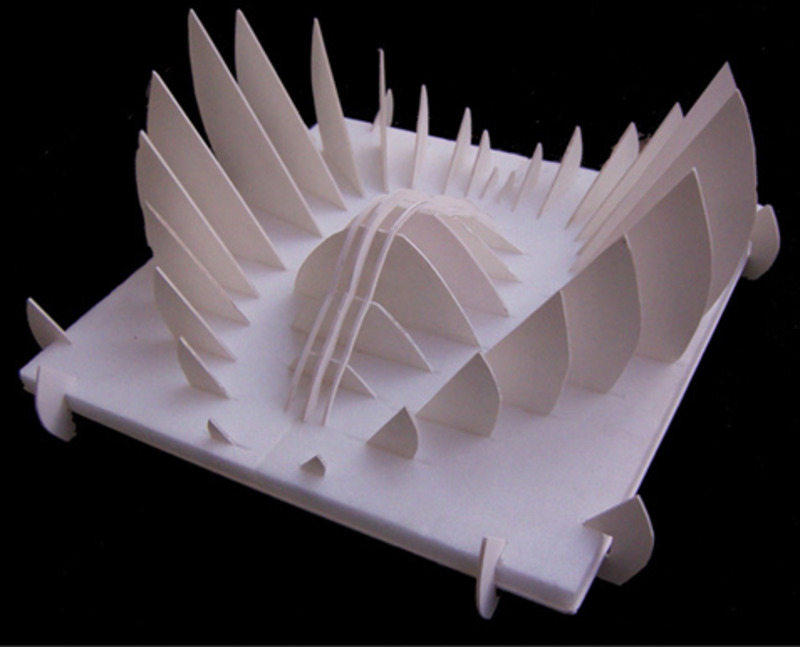
To create physical models using machines
Another way Rhino can be used is to form the file that a piece of machinery will use to cut or form a model you are interested in creating as a designer. For example, most 3D printers and laser cutters will be able to read Rhino files and the files that can be exported from Rhino.
In this sense, even if it means modeling in one plane and constructing the rest of the model later once the real materials have been cut out, Rhino can be used to create real world physical models to enhance an idea.
How to do 3D modeling without Rhino
It may be the case that you see the work involved in learning Rhino and think it’s not worth it. Especially if you’re already familiar with other software. Below are some alternatives to modeling in Rhino so you can still represent your architectural ideas in a professional manner.
Revit
Revit is the biggest competitor to Rhino and the chances are quite high that if an architect or an architecture firm doesn’t model in Rhino, they will model in Revit instead. Using this software can be a great alternative and will still produce the same type of files that Rhino does (.3dm).
What’s more is through using plugins and learning the basics about transferring files, you can work seamlessly between the two pieces of software so it is also possible to use Rhino for some areas of modeling such as simulation and then transfer the model back over to Revit to complete the rest of your work on AutoCad.
Sketchup
Sketchup is Google’s CAD software and is a lot easier to use than Rhino. Having said this, there are significantly less features in Google SketchUp so it is only recommended to use this software if you’re modeling something extremely simple or you don’t care about the final finish of the model.
Adding to this, it is harder to render in Google Sketchup as there are simply fewer plugins to choose from and it may not be suitable for professional pages of a portfolio and to realistically represent an idea.
Physical modeling
Physical modeling can be just as good if not better than strictly using CAD to create ideas. In addition, physical modeling works best when it is used alongside other physical models at the same scale so orientations can be varied and ideas can be sparked simply by looking at the model.
Many find it a lot harder to come up with ideas when they are staring at a digital screen rather than seeing a building in the real world at a smaller scale and amongst any additional context of the site.
Sketching
Last on the list is sketching. You can quickly and easily form ideas that are in your head and maybe use this before 3D modeling in Rhino so you know exactly what you need to create once you get started with the software.
Furthermore, when done right, a sketch can be represented very well. For instance, making sure you go over the details of a sketch in pen and then scanning it, cleaning it up and presenting it in a portfolio page is a great way to begin representing ideas.
This is especially true if you’re god with a pencil and have an artistic ability to represent ideas well by drawing. After all, architecture is a creative subject and adding in a sketch in the right places will never harm the idea development of a project, especially in the initial stages of design.