Are you confused about how to design the stairs that will fit well in your Rhino model? Struggling to get the right amount of steps in the distance you have?
In this article, we go over how to do this so you don’t have to spend a lot of time on creating stairs and you can just follow this guide to solve all of your problems. Ending up with uneven stairs or realizing that you have to redo them can be a pain so stick around and pay close attention to my tutorial. It doesn’t have to be that hard.
contents
Step by step: how to model stairs in Rhino 3D
Modeling stairs is in fact fairly simple. Throughout the following steps, there are a few things you should do in order to make the stairs you need and fill out the right amount of space between floors.
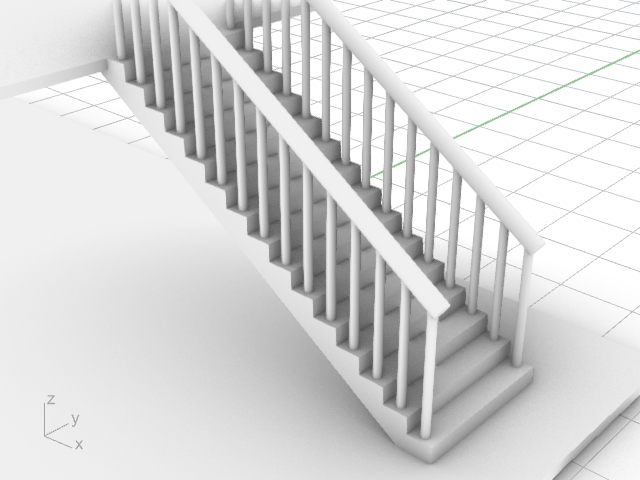
Having the correct rise of a stair is crucial to make sure a technical drawing created in the future from your model makes sense architecturally. So, imagine the below floors are within a house, under a roof and you are trying to add your staircase in between like so.

Measure the length of the staircase
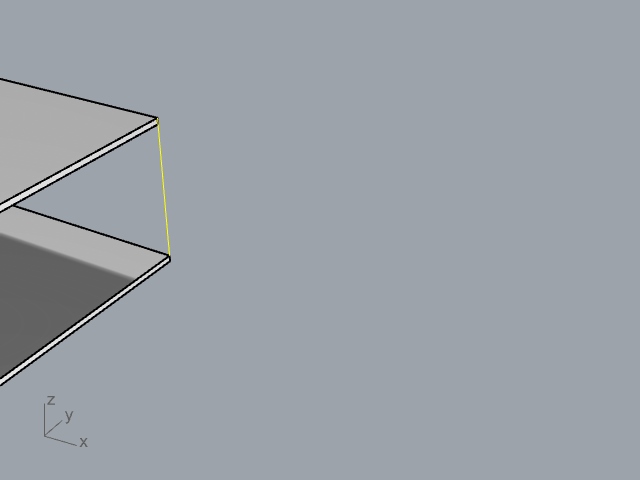
The first thing I did was find the height of the staircase (not just the height of one stair). To do this, select the polyline tool or type in “Polyline” in the command bar which will allow you to begin drawing.
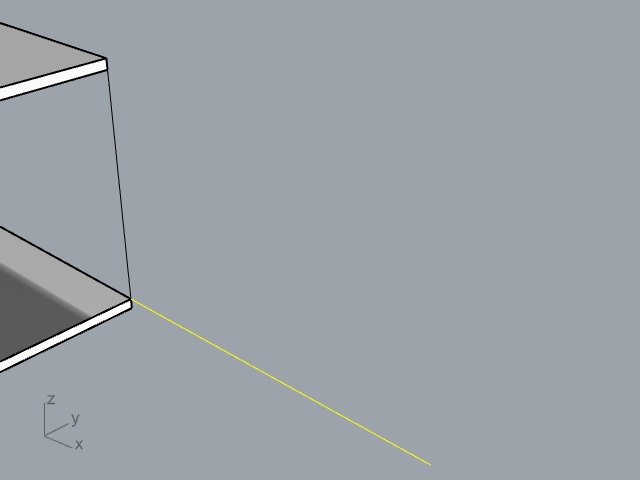
After this, I copied and pasted the same line, turned it 90 degrees using Gumball, typed in the command line “Scale1D”, pressed “Enter” and then typed in 1.5 for the scale factor to scale the line by.
After this, I clicked on the line to complete the command and used the “Move” command to get the line in the right position as seen below.
Now, these two lines make up the rise and run of the staircase as typically, the length of a stair is usually 1.5 times the height of a stair so this works reasonably well.
Work out the rise and run of the stairs
The next thing you should do is work out the height of the staircase by selecting the first, vertical polyline and then running the command “Length”.
When I did this in the example, the length was 3 meters. However, you could be working with other units such as millimeters. To check what units you are in or to change them go to File > Properties > Units in Rhino.
I then divided this 3 meter length by 0.2m (the average height of a stair) to find out how many stairs can fit in the staircase with the height of the staircase there is. The answer is 15.
If you find that there is not an exact amount of stairs that can fit in your staircase, then you should round to the nearest whole number.
Divide the height of the stairs by 15
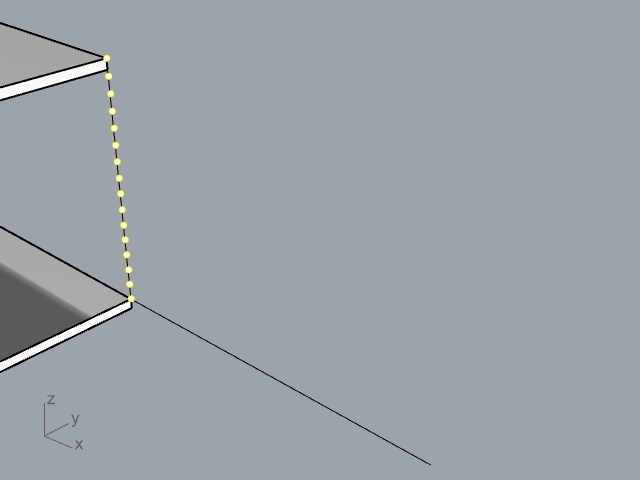
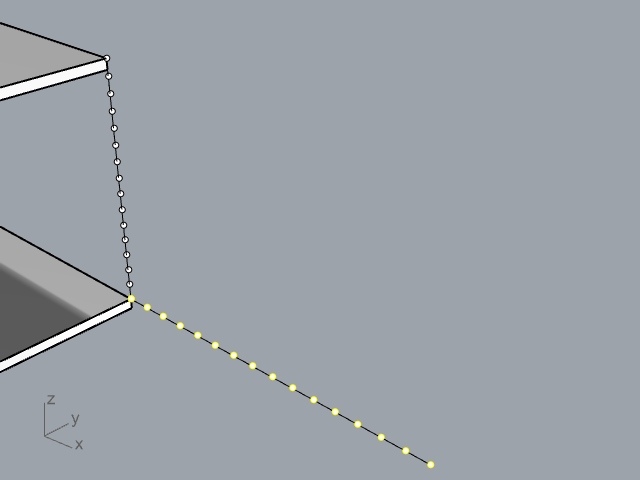
Using the “Divide” command and then by typing in 15, you should be able to create a series of snapping points that are all equals paced apart.
Divide the length of the stairs by 15
In the same way, doing the “Divide” command on the polyline that represents the length of the stairs and dividing by 15 will give you the markings for where the stairs will be
Create one step
Using the snapping points you have created, type in the command “Box” and begin drawing the first stair at the bottom of the staircase like below. Be sure to snap to the snapping points so the stair is the exact dimensions of the lengths and heights between the points.
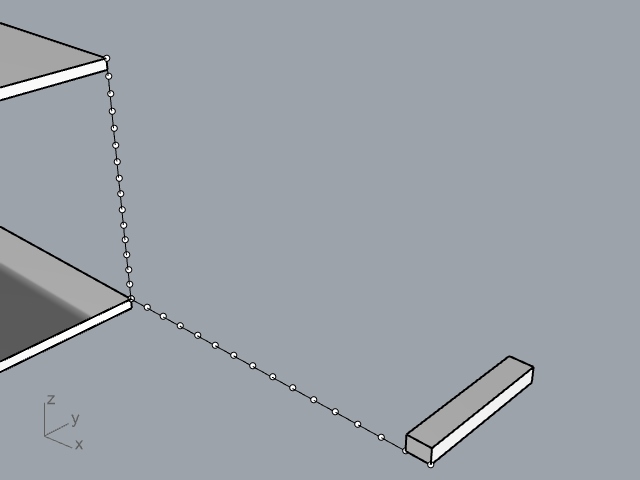
Add a line
Next, I added a line from the base of the first step to the top of the second floor. This will come in useful later when arranging the stairs so should be added in now.
To do so, simply type in “Polyline” and then begin to draw, selecting either end using your mouse or trackpad.

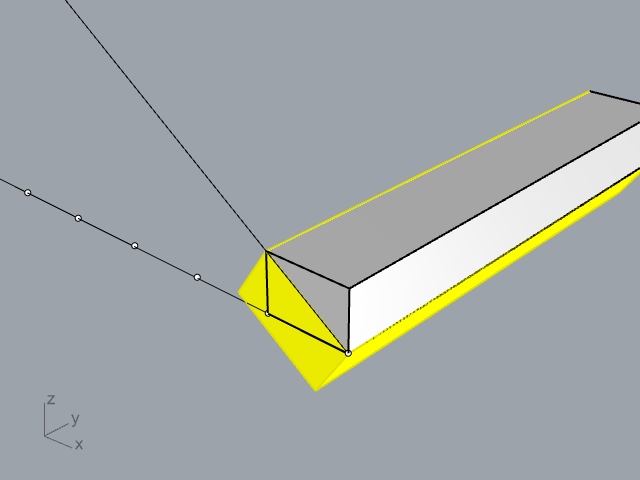
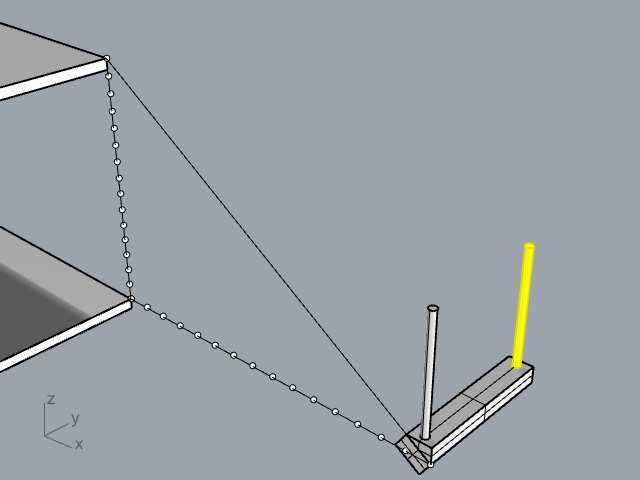
Add a base to the step
You do not want the stairs of the model to appear like they are floating or there is no structural support. In addition, from the lower floors, you want a flat surface rather than simply seeing the base of a stair in Rhino.
So, using the box tool (3-point box) you will need to add in a box that fits within the first step you created and sits at an angle, going from each diagonal corner of the stair.
BooleanUnion the two shapes
Next, type into the command bar “BooleanUnion” after selecting the two shapes as this will create both boxes into one shape.

Add a bannister
To consider the safety of the users of the building and to make the staircase more realistic, I added bannisters to the stairs. Begin by adding in a line like below using the “Polyline” command.

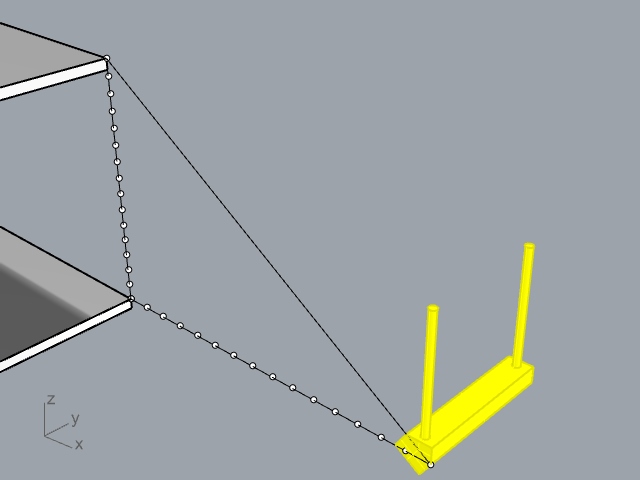
Pipe the polyline
Next, select the line and use the “Pipe” command which will prompt you to input a diameter for the pipe on either side. I used 0.05m as a diameter on both sides but you can get creative here and have the pipe thicker on one side if you want to.
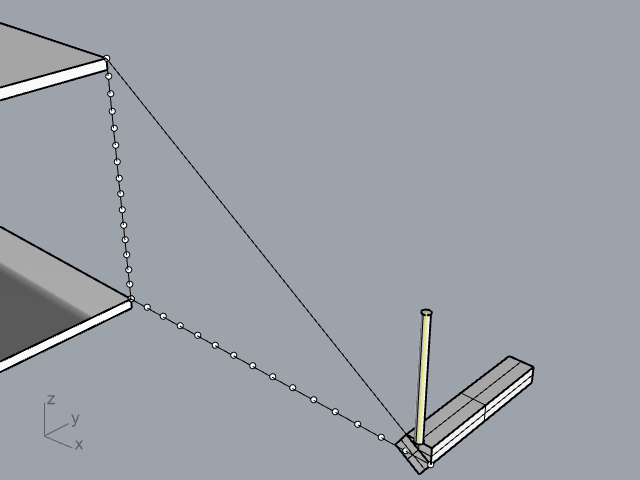
Move the pipe inwards and mirror
As the bannister will be on both sides of the stair in this case, I moved the pipe inwards so it doesn’t protrude out of the side of the stairs and I also mirrored the pipe so to the other side of the stair.
BooleanUnion everything
In order to get the array done in the correct way in the next step, you need to merge the bannister arms and the stairs that you have created using the “BooleanUnion” command.
This simply turns everything into one object that can be easily edited.
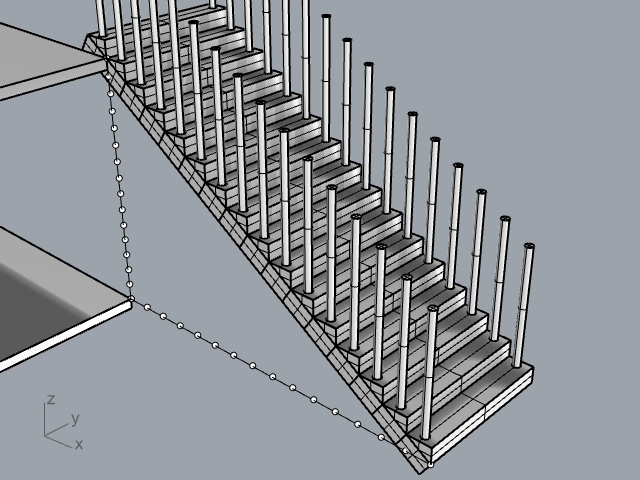
Array the steps
To turn one step into 15, you need to type into the command line “ArrayCrv”. If you want the last step to be above the top of the floor, you should type in 16 for the number of items but if not, type in 15 as seen below.
Make sure the setting “Freeform” is also turned on and selected as this will allow you to array the steps in the right way.

Once you press “OK”, the stairs should appear as below. This will make the stairs into 16 steps instead of one and from here you can begin editing the final details of the stairs.
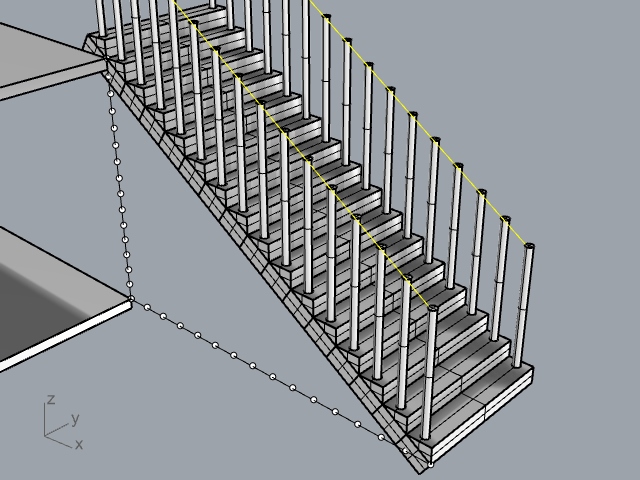
Add in the final railing
To add the final railing of the stairs so that there are not just poles on top of each step, draw a line from the top of the bannister to the bottom using the “Polyline” tool like below.
In this step, you may also want to delete every other pipe that has been created as it is a bit much to have a pole on every step.
Clean up the details
To finalize the process, I used the “Pipe” command on the lines created previously and adjusted the pipes so they sit nicely over the bannister poles.
As well as this, I arranged the floors to where I wanted them to be but you can also move the stairs to the floor instead so they fit within the wall you require.
Finally, I deleted the top step by using the “Explode” command on the top step segment which allows you to select individual surfaces and then displayed the final model in the arctic view to give a clean finish.
What’s great about this type of stair design is there is room underneath the stairs perhaps for additional furniture and to save on storage. When displaying your stairs in Rhino, you could add in a scale figure or two around the stairway to represent this scale and space.

Exploring alternate methods for creating stairs in Rhino 3D
In Rhino, stairs don’t have to be as simple as the above tutorial and you are pretty much free to create stairs however you like. Below are some more methods for creating stairs that I have created and what these types of stairs look like.
Reverse stairs
A reverse stair, also known as a hanging stair, is a type of staircase where the steps are suspended from the ceiling or a structural support above the staircase rather than being supported from the ground below and taking up room on the floor.
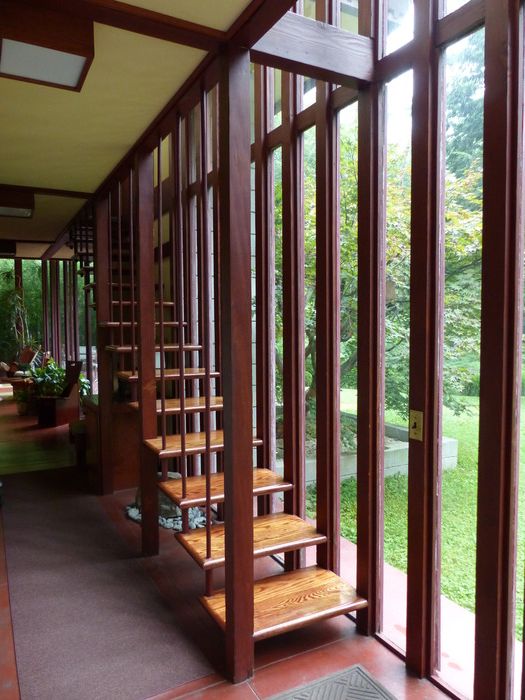
Reverse stairs are most commonly used in more modern and contemporary architecture as seen in the above design and are useful in small spaces as they take up less floor space.
However, reverse stairs can be more difficult and expensive to construct than traditional stairs, as they require careful engineering and the use of specialized hardware to suspend the steps of the stair in the right way.
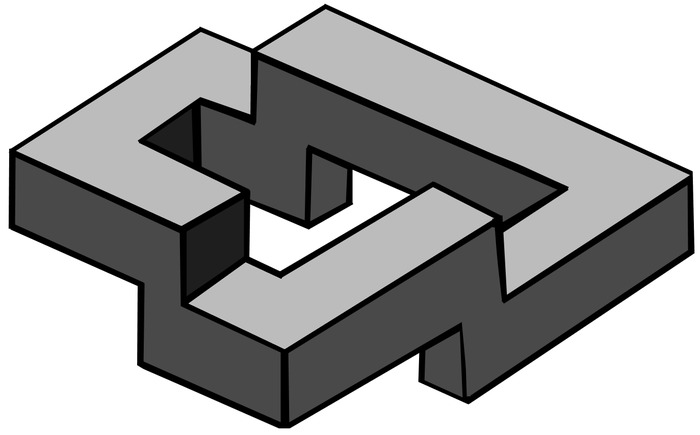
Penrose stairs
Modeling a penrose stair in Rhino can be a hard task as a Penrose stair is a type of impossible staircase or an impossible object and is a common type of optical illusion. So it would be difficult to create this using architectural modeling exercises in Rhino and it may be better to use something like illustrator. However, it can be done.
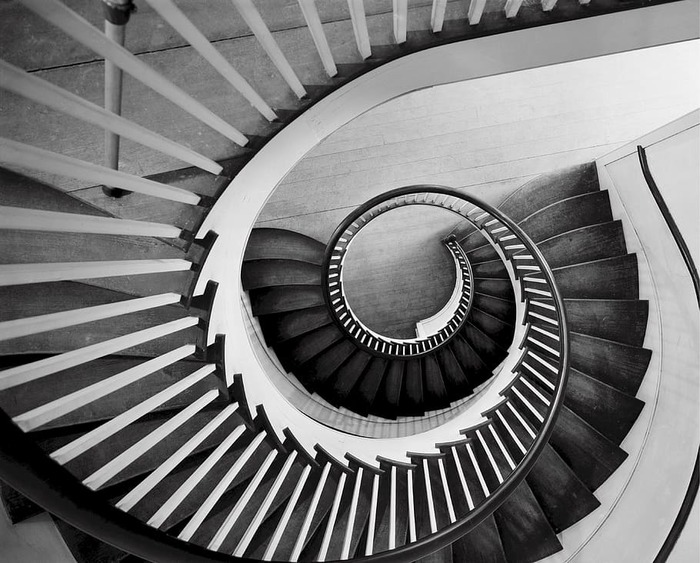
Spiral stairs
A spiral stair is a type of staircase that consists of a central post or column where there are steps that wind in a spiral pattern around this column to create a staircase that you move around as you get higher.
Spiral stairs are a popular choice when you need an efficient use of space or there is a significant height to climb without there being a lot of lateral space to build the staircase in like in a lighthouse for instance.
Calculating the rise and run for stairs in Rhino
In Rhino 3D, calculating the rise and run of stairs can get difficult. If you have terms or the distance from one floor to the next is particularly long.
Being able to accurately measure and array stairs without having them sticking out of your building facade after executing commands is vital to maintain the accuracy of your model.
In general, most stairs are around 200mm high and around 300m wide and the length of a stair is usually around 1.5 times the height.
Nonetheless, for customized stairs, these dimensions can vary, but you should always make sure stairs are ergonomic and people can walk up and down them effectively. No matter if you’re designing conventional stairs or stair step topography to allow people to move around.
How to calculate rise if you have the run
To calculate the rise of a stair if you have the run, divide the length for run by 1.5. However, if you have the rise of the entire staircase, divide this length by 200mm.
How to calculate run if you have the rise
In the opposite way, to find out the run of a stair if you have the length for rise, multiply by 1.5 and when it comes to staircases, divide the length of the staircase by 300mm.
Common mistakes when calculating rise and run
Briefly, here are some things you may be having problems with if you don’t know how to calculate run over rise in Rhino:
Not measuring correctly
To be sure about the dimensions for stairs, you should check lengths by regularly clicking and typing in the “Length” command which is able to tell you how long something is.
Focus on the length and height or the rise and run of stairs as the width isn’t as important when designing.
Not having uniform steps
Another common mistake is creating steps that are not uniform in size. This can make the stairs difficult to navigate and also unsafe to use when you come to present your project. To avoid this, copy and paste stairs or use the “ArrayCrv” command.
Not using railing correctly
Railings are an important safety feature of stairs, but they need to be designed and placed correctly as if the railings are too low or too high, they won’t be effective in terms of safety.
They also need to be placed in a way that doesn’t stop the user of the space from walking up and down the stairs like if the bannister was too far inside the stair step for instance.
For further tutorials on modeling the features of a house to stay away from mistakes click here to learn about building a roof and see our article on turning your stairs into a technical drawing too.