Are you interested in learning how to create a simple building facade in Rhino 3D? Doing so will help you learn a new skill that will allow you to design and model realistic building facades for your projects.
Whether you’re using the facade for clients or for a personal project, with the help of our tutorial on how to make a simple building facade in Rhino 3D you’ll be able to stop wasting time on Rhino and only focus on building the model you need so it can look good in your technical drawings.
Follow along and make sure you check out our email list too for tutorials just like this that feed you tips on helping you on your journey learning Rhino as an architect
contents
How to make a building facade step by step
This tutorial is on how to model a basic facade so your building has additional texture and context when it appears in a site model or perhaps if it is the main model you want to represent.
As we go through this tutorial, if you’re not sure about any of the commands that are being used or how to select certain objects, it may be the case that your basic modeling skills need improving in which case I owls recommend you check out the architectural modeling exercises the team at Architecture Genie have put together.
By the time you have finished the steps, you should have a facade on your building that is realistic and 3D. Showing off the features of the building without standing out too much.
Find the building you want to model for your facade
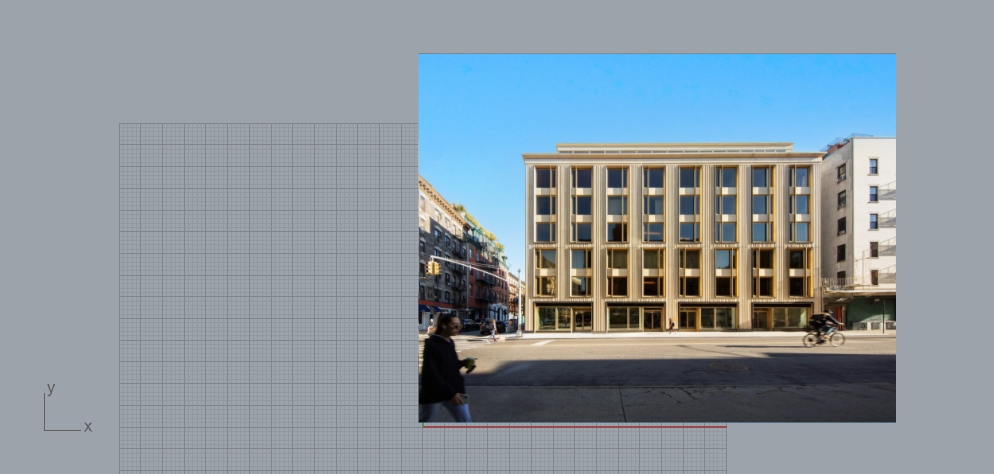
In this tutorial I have taken an image from google, however, you can also go to the site of your building and find the exact building you need context for on Google Earth. Make sure you find the highest quality image possible as this is vital in making sure you know how to trace the image in later steps.

Filtering by the largest images like seen above will give you the highest quality images if you do choose to take an image from Google. Also, making use of Photoshop and cleaning up the lines in an image can also be useful before you open Rhino, especially if you took the image from Google Earth where the satellite images aren’t as precise.
Note you do not have to produce the exact same facade as the image you have found as you could improvise and add in details to the facade that aren’t in the image. However, for the sake of keeping things straight forward in this tutorial. The image chosen will be traced exactly.
Step 1: Add the picture to your Rhino canvas
Once you have found the right image, go over to Rhino and operate in the “top” view. From here, drag and drop the image you have chosen onto the canvas.
If you are looking to scale the image straight away, this can be done now by measuring the image against an already measured line. However, this is more easily done later when the facade is finalized.
Step 2: Edit the image in Rhino to prepare it for tracing
First of all, you want to make sure that the image you have dragged on the Rhino canvas is in its own layer on the layers panel. You can change this around by doing the “ChangeLayer” command in Rhino.
Next, click the picture and then select the “Material” panel in Rhino which is usually on the right hand side (it has an icon resembling a paint tube). From here toggle the object transparency down so the picture you have important becomes transparent.
After this you’d need to lock the layer by typing in the command line “Lock”.
Step 3: Trace the building facade
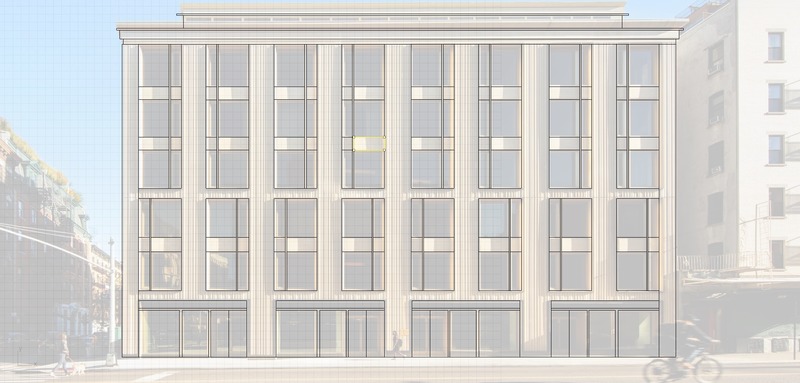
As you begin tracing the building facade, there are a few things you should note. First of all, accuracy doesn’t matter so much in relation to the picture but instead you should focus on making the repeated parts of the facade congruent with one another.
For example, in this case there are a series of repeating windows. It would be okay for the windows to appear slightly different to the picture, as long as each of these windows are the same in Rhino.
Also, when you begin tracing these repeating elements, make sure you take advantage of the repeated elements by copying and pasting where necessary and spacing out these copied elements in even intervals if this makes sense.
Finally, as you trace, make sure you are using a new layer to the picture and you have the correct Osnap commands on as well as SmartTrack turned on at the bottom of the Rhino dashboard. This will make it easy to trace.
Overall, you should take your time tracing the facade until you have a facade looking like the below image. Make sure all of the sections of the facade are closed by using the “Join” command like in the windows for example and getting rid of unnecessary lines by using the “Trim” command too.
Step 4: Extrude the curves to make the facade 3D
By separating all of the different components of the facade, you should be able to extrude each of them differently by selecting and using the “ExtrudeCrv” command in order to create depth on the model. This is why it is so important to make sure each element of the facade you want to extrude by varying amounts is a closed curve in the previous step.
Once you have finished with the extrusions, you can use the command “Cap” to turn all of the curves into extruded polysurfaces.
In general, as you begin extruding, go over to the right or left hand view to make things easier and extrude the smallest features of the facade by the smallest amount and the larger features such as pillars and walls by more. This creates a realistic looking feel. As you can see in the below example, the pillars on the ends of the building are extruded the most and the windows the least.
For the final step after you have extruded all of the curves, you may need to add in a surface behind the open elements of the facade like in the windows to make sure the building doesn’t appear hollow. This can be done easily by tracing around the entire outline of the facade with a line and then operating the “PlanarSrf” command.
From changing the model to a shaded view, you can now see how the facade has depth and is starting to look realistic.

Step 5: Duplicate the facade if necessary
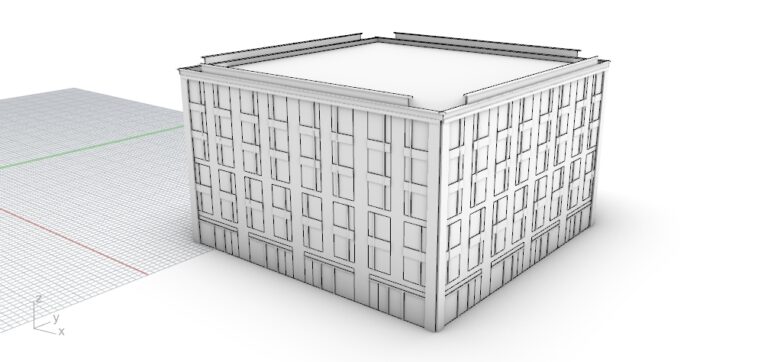
Finally, you can take this facade you have modeled and turn it into a building by rotating it to stand upright and duplicating it four times to create the building. After this, be sure to utilize the “Move” command to align the facades with each other without leaving any gaps.
Of course, not all buildings have the same facade on all four sides of the structure. However, you may be able to get away with this especially if the building you are designing is only for the wider context of a site and not the main building you will be modeling.
And that is it, you have created a building with a basic facade and can repeat these steps for any more building you wish to create in Rhino. You can then also add in any further context such as stairs you may see within the building, outdoor furniture on the outside of the building or even scale figures to add in additional context.
Finally, make sure you cap the top of the building if you decide to duplicate the facade and turn it into a building as having a roof is essential for conducting further analysis later down the line. Especially if the facade is part of a wider site model.

What other types of building facades can you model in Rhino?
You may find the creation of a facade like this is quite simple in which case you can look no further than the Architecture Genie website to find a range of other facade tutorials. From scripting your own facade to creating a sawtooth facade, there are a range of alternatives so you can create the building you want.
Rhino grasshopper facade script
Rhino grasshopper can be a great way to test different formations and play around with ideas until you decide on a final model. Once you have done this, you can “Bake” the design you have modeled in JavaScript to produce a 3D model in your Rhino canvas.
If you do use grasshopper facade scripts, you can design the facade with multiple tessellating shapes or parts of the facade that extrude quite easily. There is also the option to create wavy facades that look as if they are blowing in the wind.
This scripting uses the aid of computers to help in design which is what it means to model parametrically and create a parametric facade in Rhino.
grasshopper perforated facade
Alongside using grasshopper to model the facade, you can als add in perforation to create a perforated facade. This is perfect if you need a bit of sunlight to come through the facade but you still want the benefit from some shading.
Also, it may be the case that you want the building to have some privacy from the outside world, in which case deciding a facade in this way will also make sense. Whatever your reason, check out our tutorial on the topic.
folding facade
Folding facades are becoming ever more popular as buildings are being designed to adapt to a changing climate and deal with the temperature extremes that are becoming more prevalent in parts of the world experiencing climate change.
In addition, if the idea of the building is to be designed so that the users of the space can form their own environment and change how they want to use the space, you may also incorporate a folding facade for this reason. Only parts of the facade could be folded or the entire facade length could fold in one big movement. The choice is up to you as a designer.
sawtooth facade
Sawtooth facades are simple to design yet they add a lot of character to buildings. Not only so they look good aesthetically but they can also prevent glare and help with shading throughout the daytime.
Once you have perfected creating sawtooth facades you can also angles like it to the roofs of buildings or perhaps even use the same technique on the inside of the building if you want to mirror this design language.
