As the rhino software is learned, you may find yourself stuck at creating basic building features such as walls. Being able to know step by step how to create the right building features is crucial in the design of any model in architecture.
So, if this sounds like you, read on as in this tutorial we will guide you step-by-step through the process of creating a wall using various tools and techniques as well as how to modify walls in Rhino once you have set them up. Learn how to model walls effortlessly by reading on.
contents
How to make walls in Rhino 3D step by step
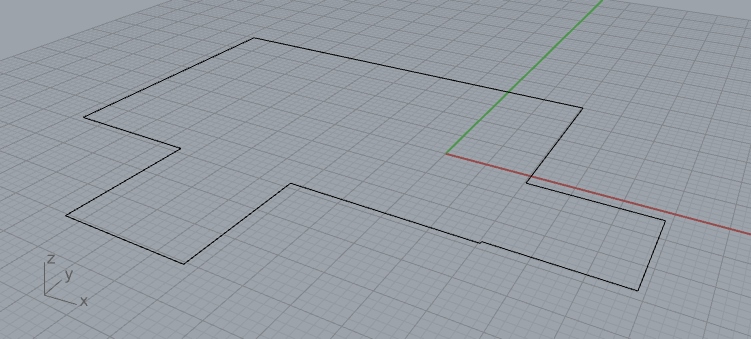
First of all, when starting to make a wall, usually you will have a floor plan that may look like the below shape.
From here, it is your task as a designer to create a wall with the right thickness and height for the building you desire. After this step, you can add other features to the building such as stairs and furniture.
Whatever you choose to add in afterwards, making sure you have the right shape for the wall laid out in a shape like this is crucial to start making a wall.
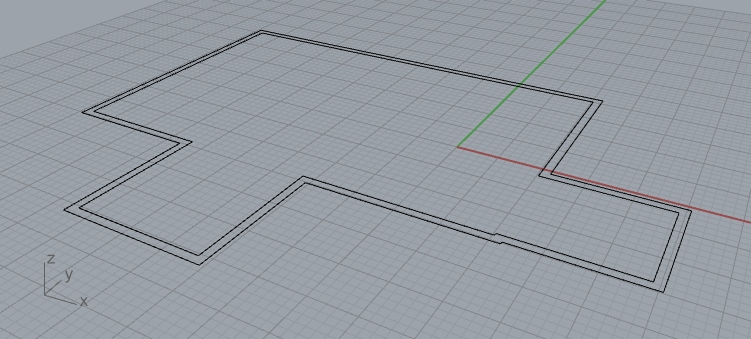
Step 1: Use the offset command
Before using any kind of command, make sure all of the curves that make up the outline of the wall you want to design are joined together by selecting everything and typing in the Rhino command line “Join”. Next, you will be able to use the “Offset” command which is perfect for creating another line in between the original line you have drawn.
This new distance between the two lines will represent the thickness of the wall, so use this opportunity to create the right distance between them by inputting the number that is the width of the wall in the command line when prompted.
Before you do this, make sure your model is set up to scale and the units you are using are correct. If not, you may have to re-scale the model later to add in further aspects to the model accurately. Doing this right the first time can save you time and effort in the future as you continue to model.
Join the Architecture Genie mailing list if you’re not sure about how to scale as tips like this are fed to your inbox on a regular basis so you can make sense of Rhino and shortcut the learning required to produce excellent models.
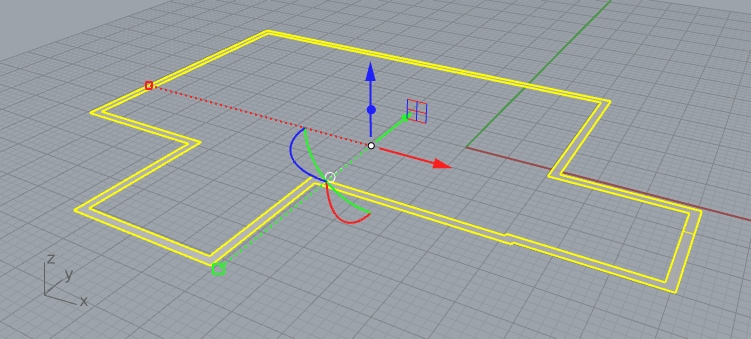
Step 2: Turn the curves into surfaces
In this step, simply select all of the lines in the canvas that you have created and type into the command line “PlanarSrf”. This will create a surface between the two lines that will act as the base of the wall.
As a result, rather than leaving the wall hollow as the wall is extruded in the next step by extruding the curve, you are able to extrude the surface instead which will give the wall a capped finish which appears more realistic.
After you have done this command, you may delete the original curves either side of the surface if you want to clean up the model but this step isn’t entirely necessary.
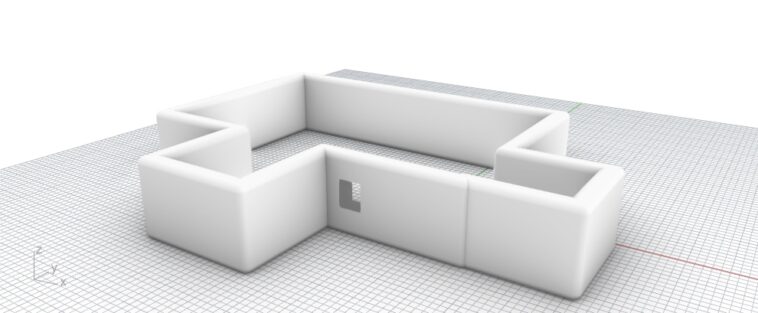
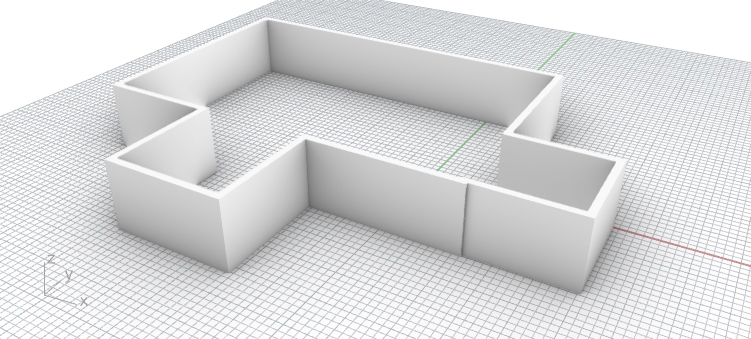
Step 3: extrude the surface to the height of the wall
As you can see, step 3 involved changing the viewport to rendered by clicking the down arrow on the perspective viewport name and selecting a new viewing style. This is just so the model is more clearly represented as the wall is extruded and it is clear the wall is a solid rather than a series of surfaces.
Once you have changed this viewport to rendered (if that’s how you’d like to represent the model), type into the command line “ExtrudeSrf” which will then prompt you to input a length that you’d like to extrude the wall. Alternatively, use the trackpad or mouse to manually adjust the length of the wall too.
After completing this step, you should have a wall like below that looks realistic with a thickness that represents the size and scale of the building.
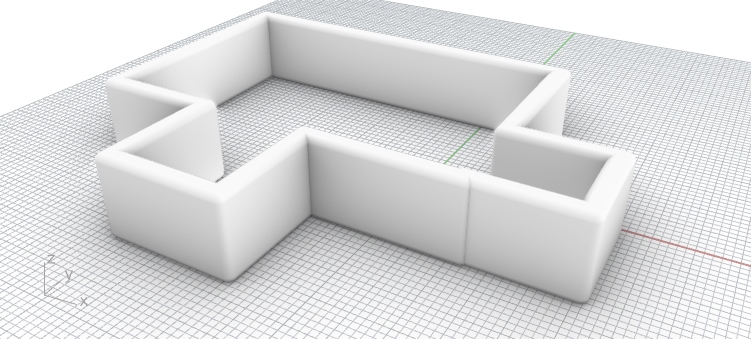
Step 4: Use the OffsetSrf command (Optional)
Another step you can take to change the look of your wall is to add an extra layer to the wall which is rounded. This is done by extruding the surface again. However, because this surface is already extruded horizontally, the Rhino software will instead ask if you’d like to extrude vertically on all sides of the wall.
As a result, the wall becomes thicker in comparison to the original wall as additional material is effectively added on to the sides. In addition to this, the walls become rounded which is perfect for creating a more modern looking wall or perhaps the start of a facade that isn’t as sharp as the right angles created by extruding the wall originally.
Finally, once you have made sense of the command, type in “ExtrudeSrf” to begin the process. Make sure you toggle the prompts in the command line that appear so you can control the extent of the curve and how padded you want the wall to appear.
Common mistakes when modeling walls in Rhino 3D
Of course, there are mistakes that are commonly made when modeling in Rhino. So, to make sure you don’t get anything wrong, it is important to go over the below common mistakes before or after you have completed your design to reduce your chances of doing something wrong.
Avoid making walls too thick
When designing and trying to pay attention to the structure of a building as you design it. As designed you may find it necessary to include extremely thick walls, especially for the base of the building if the building spans multiple floors.
However, walls don’t actually need to be that thick and unless the building is a skyscraper and 20+ floors high, usually a 800mm wall or a 1000mm wall at the most will be enough for structural engineers to make the building stand up.
If you’re not sure about this, check it out with your tutors or those you work with but in general, the load of the building can be distributed through normal sized walls and also through other interior walls of the building too that you may not have thought about.
Also, if it is the case you do have to design a thicker wall, you could try to reduce the thickness of the wall as the building goes up in height. Floors that are higher up tend to have less floors on top of them and hence require less structural reinforcement in order to work structurally. As well as this, the reduced weight of keeping walls thinner as the building gets higher reduces the load on lower floors too.
Overall, buildings that have thicker walls tend to have less room inside of them so it is worth reducing this thickness if you want to maximize the potential within the space. On top of this, as you create floor plans for the building you’re designing, it may become apparent that the walls are simply too thick anyway. So pay attention and don’t be afraid to opt for thinner walls.
Not using the right amount of windows
Windows are important for the natural light within buildings and it is easy to forget about this in the design process and add them in too late when it is harder to find the right opening as you have added furniture to the building or perhaps interior walls that interfere with where windows can be placed.
How to make an opening in Rhino
To make an opening in the wall of a Rhino model, first, create a shape that is able to immerse itself within the wall. Make sure this shape represents the shape of the window you’d like and then use the “Split” command to remove this shape from the wall.
After you have done this, you can delete the original shape you have made which will leave a hole in the wall of the model. This produces the shape of the window you need after you have also deleted either side of the wall that has been cut out.
You may also find that it’s easier to model the windows of the wall by adding in a facade to the wall too. Use our article on Rhino facades to implement this tip.

Model the floor plan before the walls
As you may be aware from modeling in Rhino, the more you model and the more the model progresses, the harder it becomes to change things that have already been designed. As a result, planning in advance can save you the hassle of having to redesign a building in Rhino and you can do this efficiently by restoring the right floor plan before the modeling starts.
You can use one plane in Rhino to begin designing a floor plan or alternatively use additional software such as Vectorworks. If you do this, it will be easy to upload the floor plan to Rhino and begin extrusion the walls in the design at the right heights in order to accurately design a model.
Nonetheless, the design process isn’t always this simple and it is perfectly fine to go back and forth between 2D technical drawings and the 3D model to formulate ideas and progress through a design. It just may take some additional time.
Make sure the walls are to scale with the rest of the building
Scale is important in architecture because everything must work in relation to each other in the design of a building. This includes the height of the walls as well as if there are any areas within the walls that are simply too small to work practically.
For example, a wall that meets another wall at an acute angle is something you’d want to generally avoid within design as it is hard to use this interior space. Also, if you’re going to create higher ceilings, consider if this will be the case on every floor and if the higher ceiling fits the concept, usability and design language of the rest of the building too.
Once you add in roofs and scale figures to the model too, you would want the walls to fit in and not appear out of shape. So, scaling is vital to complete the overall look of the model.
What other types of walls can you design in Rhino 3D?
As opposed to the conventional straight walls, it is also possible to create other types of walls to make the building in your Rhino model stand out more. This includes creating organic walls, hatch walls an also extruded brick walls.
Organic walls
Organic walls in Rhino often have curves that aren’t uniform and perhaps have living organic matter within the walls too. To create an organical wall, play around with surfaces and don’t be afraid to get creative with things like scripting too.

Hatch walls
While a hatch wall isn’t a new way of designing, it can be great to add in the hash pattern to a technical drawing such as a plan to establish where the wall starts and where the rest of the floor plan is. In order to do this, you will have to fill the walls of the orthographic drawing.
Depending on the type of hatch, it could indicate that the wall is made up of brickwork or simply just a different material to the rest of the walls or features in the drawing. This can get confusing which is why it is recommended you read our article on hatch walls.